Image formats
PNG vs WebP: Which Format Fits Your Image?
Compare PNG and WebP for screenshots, transparent graphics and photographs. Check edges, compression settings and compatibility before converting.
What is the real difference?
PNG uses lossless compression, which keeps the image’s pixel values unchanged. WebP supports both lossy and lossless compression, and it can keep transparent areas. A transparent WebP can still lose color detail through lossy compression, so check the export settings. Google’s WebP documentation explains the format’s capabilities.
For practical work, separate three questions: can the destination open the format, does the exported image look correct, and is the downloaded file usefully smaller? An answer to only one of those questions is not enough to choose a file for your intended use.
Lossless describes the compression step. Resizing, reducing the color palette or editing before saving can still change an image stored as PNG. Likewise, converting a lossy WebP to PNG preserves the pixels you have now; it cannot recover earlier losses. The lossy and lossless compression guide explains this distinction.
Compare screenshots carefully
Optimize the PNG before deciding to change format. In our opaque text-and-lines sample, the original is 109.2 kB. Pixilo’s homepage compressor reduces it to a 20.6 kB PNG while preserving the decoded pixels and 960 × 640 dimensions. We verified this output again on 24 October 2026. Pixilo’s PNG-to-WebP converter produced the 18.3 kB WebP at quality 80 on 1 October 2026, from the same original.
WebP saves about 83% against the original PNG, but only 2.4 kB, or 11.5%, against the optimized PNG. The slider now compares that optimized PNG with the WebP. For a screenshot where exact lettering matters, retaining the lossless PNG for that small extra download may be the better choice. These are results for one graphic, not a prediction for your files.
Start with the enlarged detail and move the divider across the same letters and colored edges. Look for softened strokes, faint fringes and changes around one-pixel lines. The detail view enlarges the pixels 2× to make differences easier to inspect. Switch to the full image to judge ordinary reading size; do not reject or approve a file solely because of an enlarged view.
This is one lossy WebP export, not a test of lossless WebP. Quality 80 is an encoder setting, not “80% of the original detail.” If a label, price or diagram line becomes ambiguous, keep the PNG or use an explicitly lossless workflow. A large percentage saving alone does not establish that the result is suitable.
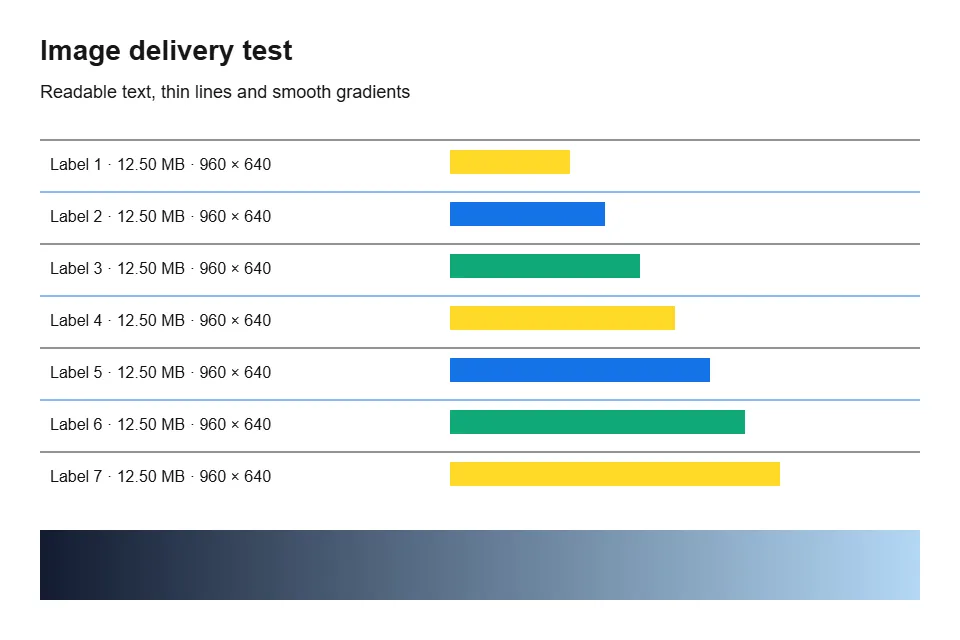
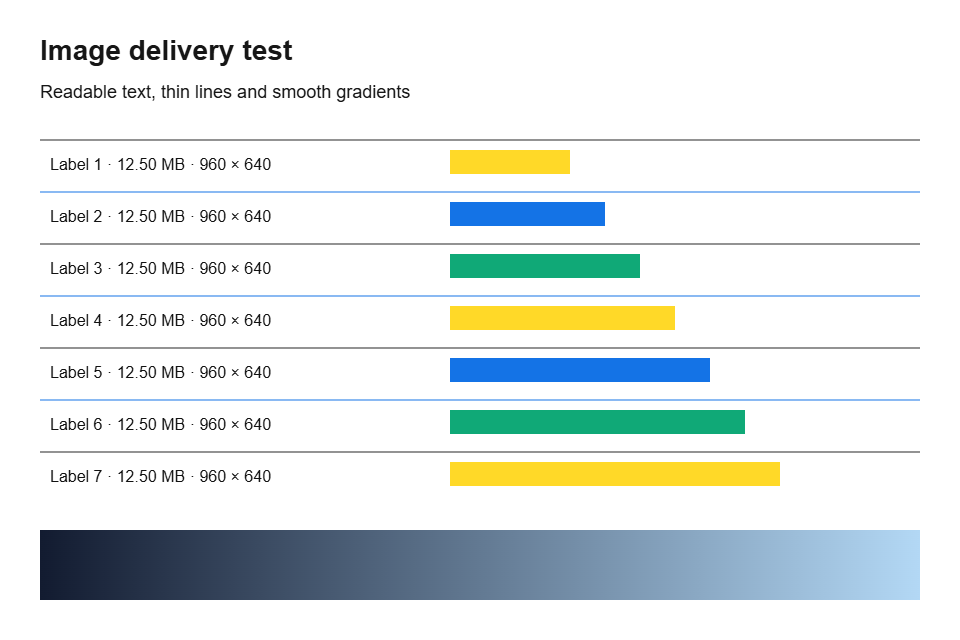
PNG optimized losslessly. WebP exported with Pixilo at quality 80; both 960 × 640 px. Drag the divider or use the arrow keys to compare.
Choose WebP quality with a stopping point
- Make a PNG baseline. Compress a copy without changing dimensions and keep the smaller PNG if the pixels remain intact.
- Try the default WebP quality. Export from the original, at the same dimensions. Inspect the smallest text or line you must preserve at normal size, then use the detail view to investigate.
- Adjust only as needed. If detail is damaged, raise quality in small steps, for example from 80 to 85 or 90. If the default is comfortably acceptable, you can test a lower setting. Always re-export from the original; these values are examples, not universal recommendations.
- Compare the final candidates. Stop when WebP’s useful size saving and visible quality both meet the task. If acceptable WebP becomes as large as the optimized PNG, keep PNG. Quality 100 still does not select lossless WebP.
Test transparent edges on two backgrounds
Transparency and color accuracy are separate properties. A WebP can retain empty areas while lossy encoding changes the color of visible pixels around an edge. The opaque example above does not test this. For your own transparent image, compare PNG and WebP on both light and dark backgrounds, including soft shadows and partially transparent edges.
A cutout that looks clean on white may show a pale outline on charcoal. Check whether that outline was already present in the PNG before blaming conversion. Judge both files against the background where they will actually appear; a checkerboard alone can hide an edge problem.
Light background
 PNG
 WebP
Dark background
PNGWebPDo not convert to JPEG if you need transparency. If your destination requires a solid background, choose that color deliberately with the background color tool and inspect the result in the destination layout.
What if the PNG is a photograph?
A photograph saved as PNG is worth comparing because lossless storage may retain more detail than a small website placement needs. Export a WebP version, then decide whether the reduction justifies the visible difference. Do not assume every PNG will shrink: simple graphics, existing optimization and export settings change the result.
Check dimensions too. Pixilo’s PNG-to-WebP converter offers a 4000-pixel limit on the longest side, enabled by default. Check the resize option and the downloaded dimensions before comparing. For a format-only test, use the same pixel dimensions; a smaller canvas can account for a large saving independently of WebP encoding.
Choose the file that passes your checks
- Keep the original PNG as your source.
- Export a WebP version from that original.
- Inspect text, edges, shadows and the final crop.
- Compare file sizes and dimensions.
- Open the file in the receiving application or live page.
For a website, keep the smaller version only when it still meets the visual requirements. For an editing handoff, prioritize the recipient’s format requirements. These are different tasks and can reasonably lead to different choices.
Repeat the test with an original representative of your work. Record source size, output size, pixel dimensions, quality setting and the detail you inspected. Here, file sizes use decimal units: 1 kB is 1,000 bytes. Keep the source even when WebP is the better delivery copy, and check the published page in case your CMS re-encodes the upload.
Can I convert WebP to PNG?
Yes. Use WebP to PNG to create a PNG copy that keeps any transparency in the WebP image. This does not restore detail removed by earlier lossy compression.
Compare one PNG before converting a batch
Use a representative image with the kind of detail you need to preserve.
Convert PNG to WebPCompare WebP with JPG → ChatGPT
 Grok
 Google
 Perplexity
 Claude