Image compression
Lossy vs Lossless Image Compression: How to Choose
Compare lossy and lossless image compression, recognize quality problems and choose suitable settings for photos, screenshots and graphics.
What is the difference between lossy and lossless compression?
Compression makes an image file take up less space. Lossless compression keeps the image’s pixel values unchanged. Lossy compression discards some detail to make the file smaller. Which approach suits your image depends on what needs to stay clear.
For an ordinary photograph, small changes may be difficult to notice at its intended display size. A product label, screenshot or diagram is less forgiving: softened edges can make the image harder to use. Decide which details your reader needs before choosing a mode.
“Without losing quality” is often used to mean “without a noticeable difference.” That is a reasonable visual goal, but it is not the definition of lossless. A good-looking lossy export still differs from its input. Likewise, a lossless file can preserve a poor image perfectly: it cannot make an out-of-focus source sharp.
Lossless also describes the encoding stage, not every step in an editing workflow. Resizing, changing colors, reducing a palette or flattening transparency can change a picture before a lossless encoder receives it. A PNG exported after those changes preserves the new image rather than undoing the changes.
Choose the smallest file that still does its job
- Need exact graphic edges or readable tiny text? Start with a lossless copy and crop unused space.
- Preparing an ordinary photograph for delivery? Test a lossy copy and inspect important details.
- Need transparency? Choose a format and tool that retain it. Lossy versus lossless alone does not answer that question.
- Still editing? Keep the master and avoid making a compressed publication file your only source.
- Trying to meet a limit? Confirm the actual limit, compare dimensions and quality, and allow resizing only when appropriate.
- Publishing through a platform? Check what it generates from your upload before optimizing the same image twice.
Compression supports a better reading experience when it reduces unnecessary loading without hiding information. It is not a ranking shortcut, and the smallest file is not automatically the best one. For the wider workflow, see how to reduce image file size.
Compare the two approaches by what you need to protect
| Question | Lossy compression | Lossless compression |
|---|---|---|
| Are input pixels recovered exactly? | No; the encoder can change them | Yes, for the image supplied to the encoder |
| Where is it worth testing? | Photographs and other images with a delivery-size budget | Text, diagrams and graphics where edge accuracy matters |
| What should you inspect? | Texture, gradients, lettering and edge artifacts | File size and any changes made before encoding |
| Does it preserve an editable project? | No | Not necessarily; a flattened image does not keep layers |
| Can it repair an earlier bad export? | No | No |
These are starting points rather than rules that every photograph must be lossy and every graphic must be PNG. Test the actual picture. A simple graphic may already be small enough to publish losslessly; a large screenshot may need a smaller crop before any format change is useful.
Do not judge the choice by extension alone. A format can offer more than one mode, and an application may expose only some of them. The settings used for the export matter as much as the file type.
How JPG, PNG, WebP and AVIF fit into the decision
Common JPG exports use lossy compression. PNG uses lossless compression. WebP supports both lossy and lossless modes, while AVIF also has different encoding possibilities. That does not mean a particular converter offers every mode or that moving a quality slider to its maximum selects lossless encoding.
For format capabilities, consult MDN’s image format reference. Google’s WebP compression documentation describes its separate lossy and lossless techniques. For a practical format choice, read which image format to use on a website.
In Pixilo, the JPG-to-WebP and PNG-to-WebP tools use a quality setting for a lossy export; they do not offer a dedicated lossless WebP mode. The AVIF converter also uses a fixed lossy setting. Use these tools when a visually acceptable delivery copy is your goal, rather than when you require exact pixel preservation.
The WebP-to-PNG converter creates a PNG without another lossy compression stage and preserves the source dimensions within its supported limits. If the WebP was already lossy, its decoded picture remains the starting point. PNG cannot bring back detail that the earlier encoder discarded, and the resulting file may be larger.
What lossy compression damage actually looks like
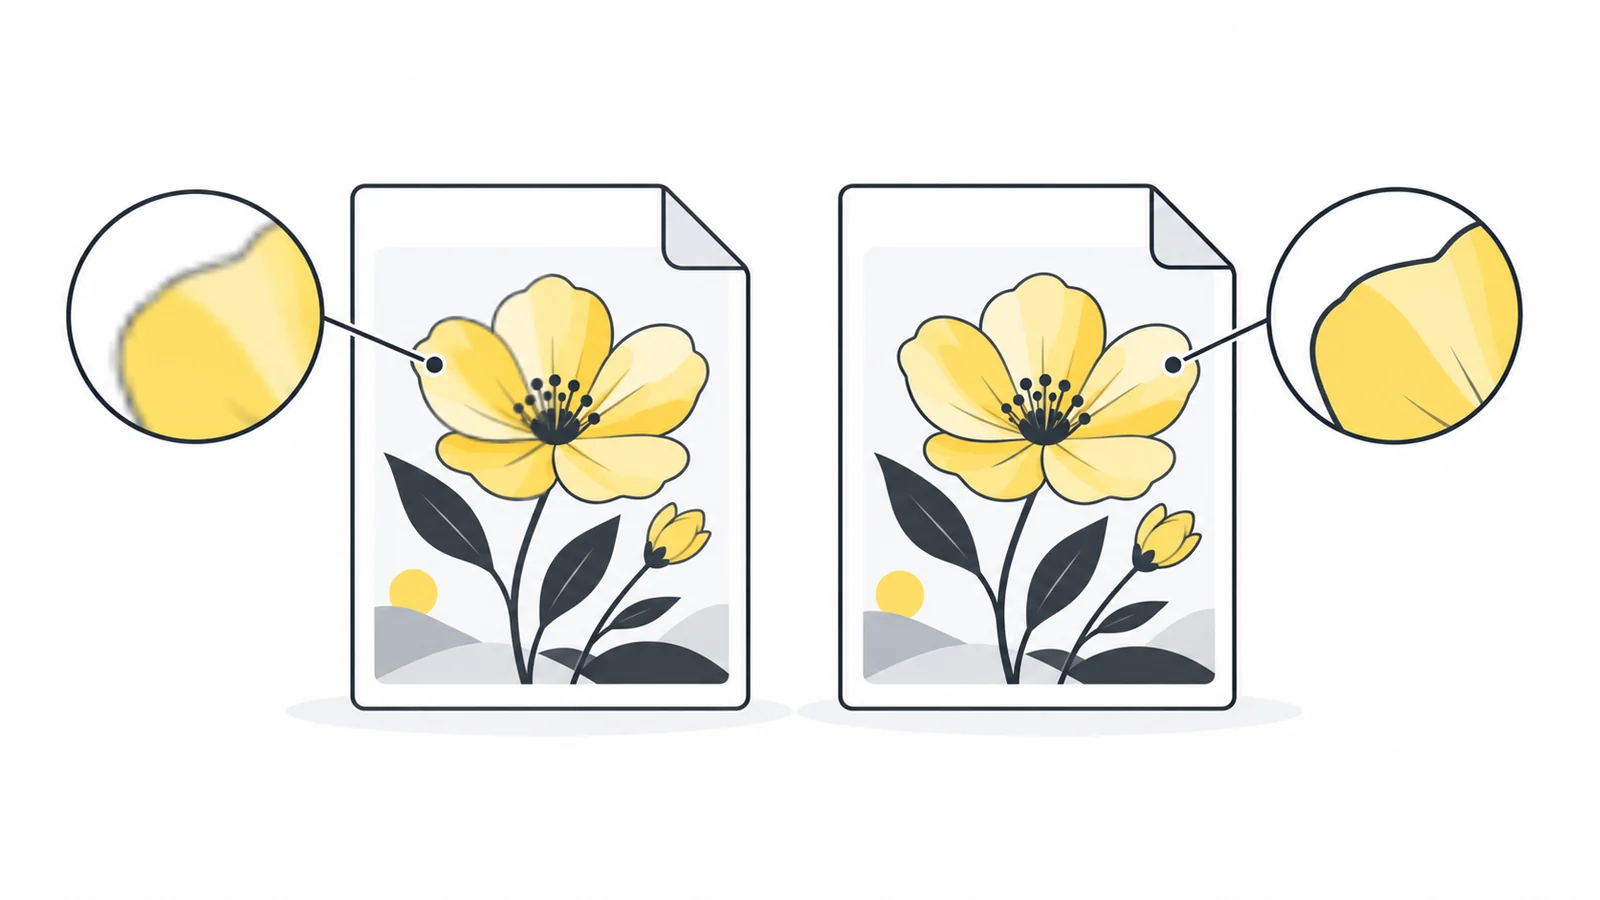
Open the export at the size people will use it, then examine the areas that carry information. Looking only at a whole thumbnail can hide an unreadable label. Looking only at a heavily enlarged corner can reject a file that works well in its intended placement. Both views answer useful, different questions.
- Small text: letter edges may look smeared, surrounded by a faint halo or unevenly colored. Check punctuation and thin strokes, not just the headline.
- Fine texture: hair, fabric or grass may merge into soft patches. For product photographs, make sure material details remain believable.
- Smooth gradients: a sky or studio background may develop visible steps or blotches. Check both bright and dark transitions.
- Strong boundaries: a dark object against a pale background may gain noise near its outline. Inspect the real page background as well.
- Shadow detail: darker areas may become blocky or lose distinctions that were visible in the source.
If you see a problem, compare with the original before blaming the export. It may come from the camera, an earlier edit or an image that was enlarged too far. Compression settings cannot correct those causes. Start again from the best available source and change one variable at a time.
A quality setting is not a percentage of detail retained
A slider marked 80% does not promise that 80% of the original detail survives, nor does it predict an 80% reduction in file size. It is a control passed to an encoder. Different formats, implementations and images respond differently, so matching numbers across tools is not a fair quality comparison.
Use the number to make repeatable tests within one tool. Export a candidate, inspect it and adjust if necessary. Do not choose a very low setting just because a previous photograph looked fine there: a second image with lettering or a fine pattern may show much more damage.
For a fair comparison between formats, aim for a similar acceptable appearance, then compare file sizes. Keep dimensions the same while testing compression. If one file is smaller because it also has fewer pixels, you have changed two things and cannot attribute the saving to the format alone.
Pixilo’s JPG-to-WebP, PNG-to-WebP, PNG-to-JPG and WebP-to-JPG converters proportionally reduce images larger than 4000 pixels on either side. Check the downloaded dimensions if your source is larger, particularly when comparing it with an export made in another application.
A practical test for a photograph and a screenshot
Suppose you are preparing a photograph for a page and a screenshot for a help article.
- Keep the originals. Export each candidate from the same source so that one candidate is not a recompressed version of another.
- Decide the displayed dimensions. Crop unnecessary space first. Use the image resizer if the files contain far more pixels than the placement needs.
- Test the photograph as a delivery copy. Try an appropriate JPG or WebP export. Examine the subject, texture and background at the intended display size.
- Test the screenshot for readability. Keep a PNG candidate and compare any smaller lossy version. Read the small labels and inspect thin interface lines.
- Record the result. Note dimensions, format, file size and why the chosen candidate is acceptable. A smaller unreadable screenshot is a failed result.
- Check after publication. Your publishing system may create another version. Inspect the file visitors receive rather than assuming it matches your download.
If the screenshot remains too large, remove irrelevant surrounding content instead of lowering quality until the text breaks. If the photograph needs more detail, increase quality or reconsider its display dimensions. These are different remedies for different problems.
For a required upload limit, try Compress to a File Size. A small limit may require a compromise, and some images cannot reach it at acceptable quality without resizing. The file size limit guide explains how to make that decision.
Avoid repeated lossy exports and misleading conversions
Downloading a compressed JPG, editing it, saving another JPG and converting that file again creates a chain of exports. Each lossy stage can introduce further changes. The first may look harmless, but small defects can become more noticeable as the chain continues.
Keep a master file and create new publication copies from it. If you are working with layers or editable text, retain the project file too; a flattened PNG is not a replacement for that project. Label final exports separately so that the smallest delivery copy does not become your next editing source by accident.
Converting JPG to PNG can be useful when the next workflow requires PNG, but it does not turn the picture back into the original photograph. Similarly, a losslessly encoded copy does not guarantee preservation of EXIF data, color profiles, animation or other file features. Those depend on the entire processing pipeline.
Many Pixilo tools redraw images in the browser to create copies for publication. They are not archival tools for preserving every property of a source file. Keep the original when its metadata or other features matter.
Frequently asked questions
Is lossless compression always better?
It is better when exact input pixels are a requirement. A larger lossless photograph can be an unnecessary download when a smaller lossy copy looks suitable for its placement. Choose around the image’s purpose rather than the label.
Is WebP always lossy?
No. WebP supports both modes. Check which mode your tool actually uses; a WebP extension or a maximum quality setting does not establish that the export is lossless.
Does a quality setting of 100 make JPG lossless?
No. A maximum slider value in an ordinary JPG export does not change it into a lossless format. It can also create a much larger file without a useful visible improvement.
Why is my PNG larger than the original JPG?
PNG stores the decoded image without another lossy encoding stage. A photograph can require more space that way. The larger file does not mean that lost detail has been recovered.
Can I compress an image without changing its dimensions?
Yes, depending on the format and tool. Compression and resizing are separate operations. Check the exported dimensions and any automatic tool limits; matching dimensions alone does not prove that the pixel values are unchanged.
Test a delivery copy without losing your original
Choose useful dimensions, compare the export with your source and keep the version that preserves the information your reader needs.
Compare a JPG with WebPWork toward a file size limit → ChatGPT
 Grok
 Google
 Perplexity
 Claude