Publishing workflows
How to Adapt One Image for Different Social Media Posts
Make separate square, portrait and landscape crops from one image. Keep the subject and text visible, resize without stretching and check the upload preview.
Choose the placement before the dimensions
“An image for social media” can mean a feed post, story, profile picture or video thumbnail. Even one platform can use several shapes. Decide where each version will appear before choosing a preset.
Check the destination's current upload requirements and preview. A tool preset is a convenient starting size, not a guarantee for every placement or account. This guide focuses on adapting the composition rather than maintaining a universal platform-size table.
Write down the target shape, required dimensions and what viewers must recognize. For a product launch, that might be the whole product and its name. For an event, it might be a face, a date and a short headline. Those priorities tell you what cannot be cut off.
Make separate versions with Pixilo
- Decide which part of the original must remain visible for each post.
- Open Social Media Sizes and choose the original JPG, PNG or WebP.
- Choose the required width and height. Use custom dimensions if the preset does not match your destination.
- Choose whether to show the whole image or fill the frame. Adjust the crop position in the preview and check faces, products and text.
- Download the result. Give each version a separate name and check the upload preview.
For precise framing, use the crop tool first. For a 4:5 portrait, a crop 1600 pixels wide and 2000 pixels high has the right ratio; check the crop’s dimensions. A PNG intermediate copy is optional when you want to avoid another lossy save before the final export.
The tool accepts one JPG, PNG or WebP at a time, up to 25 MB. Choose a square, portrait, story or landscape preset, or enter both custom dimensions. Check the requirements of your destination; preset names do not establish its current rules.
Choose JPG, PNG or WebP directly in the tool. JPG uses a fixed quality setting, so inspect fine detail. PNG can preserve transparency. For a PNG you have already downloaded, you can also use PNG to JPG. Check dimensions and file size before publishing.
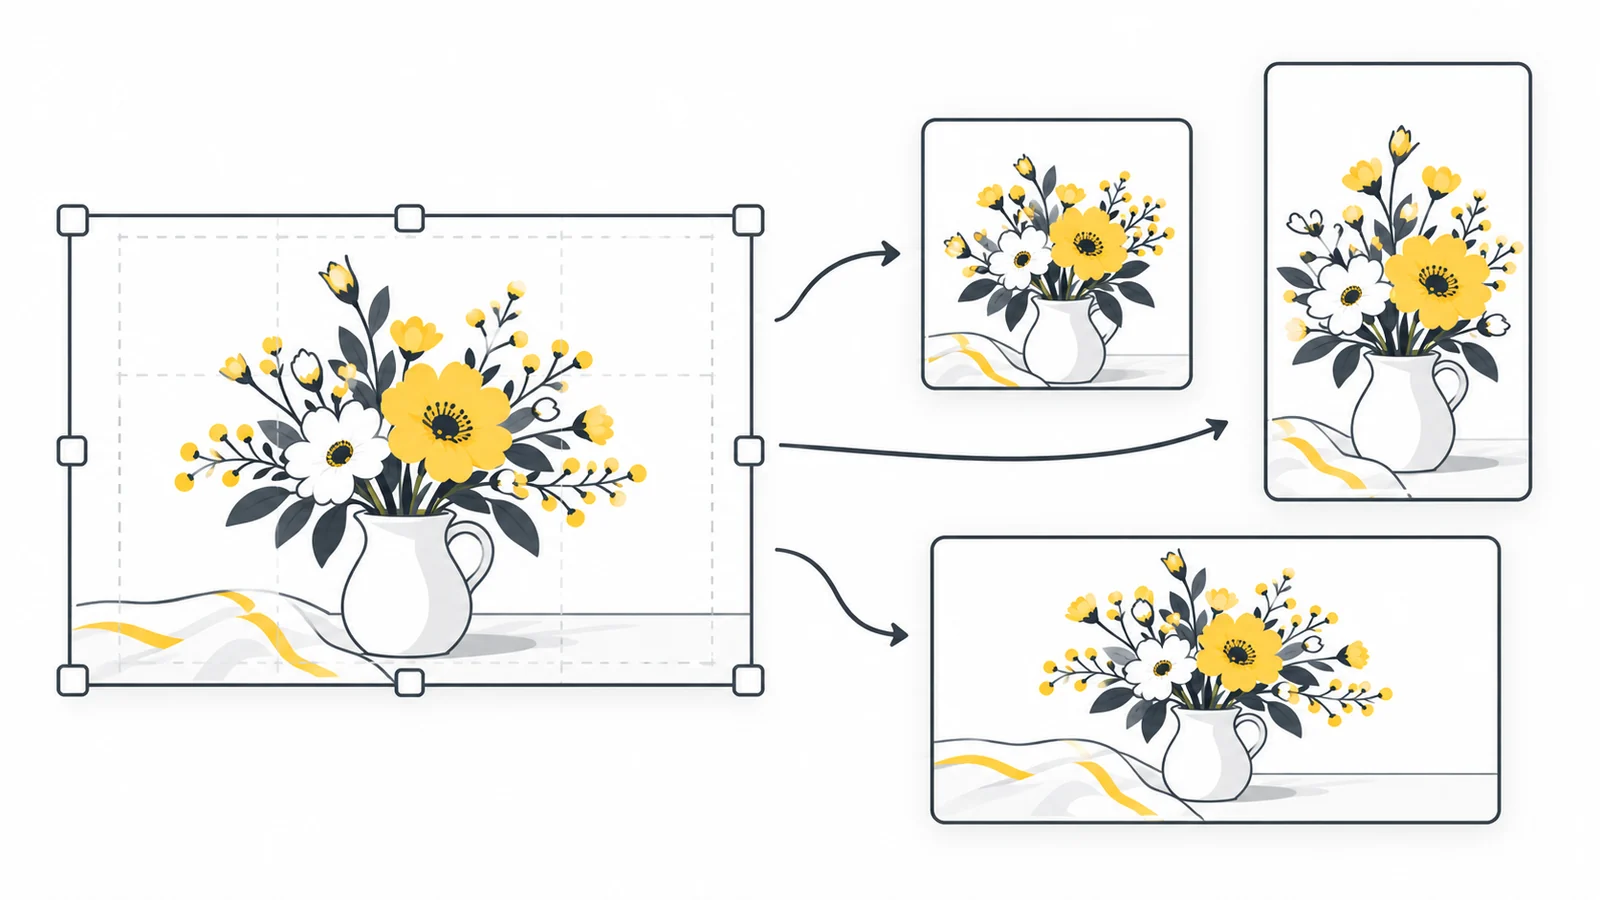
Plan square, portrait and landscape crops
| Shape | What often works | What to inspect |
|---|---|---|
| Square, 1:1 | One main subject with limited surrounding detail | Edges of products, faces and side text |
| Portrait, 4:5 or 9:16 | A vertical subject or a rebuilt vertical layout | Side details lost from the wide original |
| Landscape, 16:9 | A wide scene or subject with supporting context | Heads, feet and text near the top or bottom |
Leave room between essential content and the edges, then inspect the actual placement. Interface controls, previews and thumbnails may cover or crop different parts. There is no single margin that is safe everywhere.
A group portrait arranged across a wide image may not survive a narrow crop. If one composition cannot keep everyone visible, use another photograph or rebuild the design. Stretching the image makes everyone thinner; it does not solve the layout problem.
Understand what cropping and resizing change
Cropping removes part of the picture. Proportional resizing changes the pixel dimensions while keeping the same shape. Fitting a picture inside a different-shaped canvas keeps the whole subject but leaves space around it. Choose the operation that meets your goal.
For example, a 4000 × 3000 photo has a 4:3 ratio. A square crop can use a 3000 × 3000 region before being resized to 1080 × 1080. Sending the entire 4000 × 3000 image directly to a tool that forces 1080 × 1080 changes the proportions. The subject may look wider or narrower than it should.
A website or preview can also crop an image without changing the file. The MDN object-fit reference describes the difference between filling, containing and covering an image box. That is one reason to inspect the final placement rather than judging only the downloaded picture.
Example: adapt a product photo into three compositions
Suppose a 4000 × 3000 photograph shows a mug near the middle and a wide table around it. You need a square card, a portrait story and a landscape thumbnail. The following dimensions are illustrative export choices, not platform requirements.
For the square, take a 3000 × 3000 crop with the mug and handle fully visible, then export 1080 × 1080. For the portrait, find a 9:16 region that keeps the whole mug and enough surrounding space; resize that crop to 1080 × 1920 only if the retained source has enough pixels. For the landscape, try a 4000 × 2250 crop and resize it to 1280 × 720.
Check the handle in all three versions. If it disappears in the narrow crop, move the crop or choose another source rather than stretching the mug. If an essential headline was baked into the wide image, rebuild its placement in the design editor before exporting the portrait.
Check the upload preview and text
View each version at phone size. Read the headline without zooming and check contrast against the image. If the lettering is too small, shorten it or change the layout. A higher export quality setting cannot make a tiny paragraph readable.
Check the posting preview for overlays and unexpected cropping. If the service recompresses the upload, inspect the published result too. Compare it with the local file before deciding whether the source export or the platform processing caused a problem.
Keep dimensions and byte size separate. If the image has the right dimensions but is still too large to upload, use Compress to a File Size while preserving any required dimensions. For the underlying sizing choices, see how to resize without stretching.
Frequently asked questions
Can I use the same file for every placement?
Sometimes, but check each preview. A square composition may work in several feeds while leaving an awkward crop or unused space in a portrait placement.
Will selecting a preset crop the image for me?
Show the whole image keeps all edges and may leave borders. Fill the frame crops without stretching. Adjust the horizontal or vertical crop position to keep important details visible.
What if the original is too small after cropping?
Use a larger original, loosen the crop or rebuild the design. Enlarging a small crop does not recover the missing detail.
Make the composition work before resizing
Keep the subject intact, prepare each shape from the original and test the uploaded preview.
Choose your cropSet the final dimensions → ChatGPT
 Grok
 Google
 Perplexity
 Claude