Publishing workflows
Ad Image Sizes and Compression: A Practical Guide
Choose ad image sizes and prepare layouts for Google, Facebook and Instagram. See how to reduce file size while keeping text readable.
This guide shows you how to choose dimensions for static ad images, prepare layouts for different placements and reduce file size while keeping text and product details clear.
Ad image sizes: start with the ad type
The distinction that prevents many upload mistakes is responsive image asset versus finished banner. Google combines responsive image assets with separate headlines and logos. A finished banner already contains its design and must fit a supported banner slot.
| Ad type | Shape and dimensions | How to use the size | Maximum file size |
|---|---|---|---|
| Responsive display: landscape | 1.91:1 · 1200 × 628 px | Recommended; minimum 600 × 314 px | 5120 KB per image |
| Responsive display: square | 1:1 · 1200 × 1200 px | Recommended; minimum 300 × 300 px | 5120 KB per image |
| Responsive display: vertical | 9:16 · 900 × 1600 px | Recommended; minimum 600 × 1067 px | 5120 KB per image |
| Uploaded display banner | An exact supported banner size; see below | Required dimensions, not a resolution suggestion | 150 KB |
The responsive dimensions and limits come from Google’s responsive display best-practices guide. The banner requirements come from Google’s uploaded display specifications. Use JPG or PNG for the static workflow in this article. These are display specifications, not a universal table for Performance Max, Demand Gen or every Google campaign.
Use the recommended resolution when the original has enough detail. A minimum is the smallest accepted image, not the ideal target. A 300 KB image can be within the responsive image limit while exceeding the uploaded banner limit.
Which ad image versions should you prepare?
Choose your versions by ad type and placement. The Facebook and Instagram ratios below are planning options; confirm that your selected ad format accepts them in Ads Manager before exporting.
- Google responsive display ads: start with landscape and square image assets at the recommended dimensions in the table above. Prepare a separate vertical image if you use supported vertical placements.
- Google uploaded banners: choose the supported banner sizes your campaign needs and create a layout for each. Export at the exact required dimensions; matching the aspect ratio alone is not enough.
- Facebook and Instagram feeds and carousels: consider a 4:5 portrait layout for a feed placement that accepts it, and a 1:1 square layout for placements or carousel formats that use square images. Adjust the composition for each version instead of relying on an automatic crop.
- Facebook and Instagram Stories: prepare a separate 9:16 layout if the selected placement accepts a static image. Position the message and product so that interface overlays do not cover them, and check the ad preview.
You do not need every size for every campaign. Prepare the versions your selected placements require, keep an editable master and check each preview before uploading the final files.
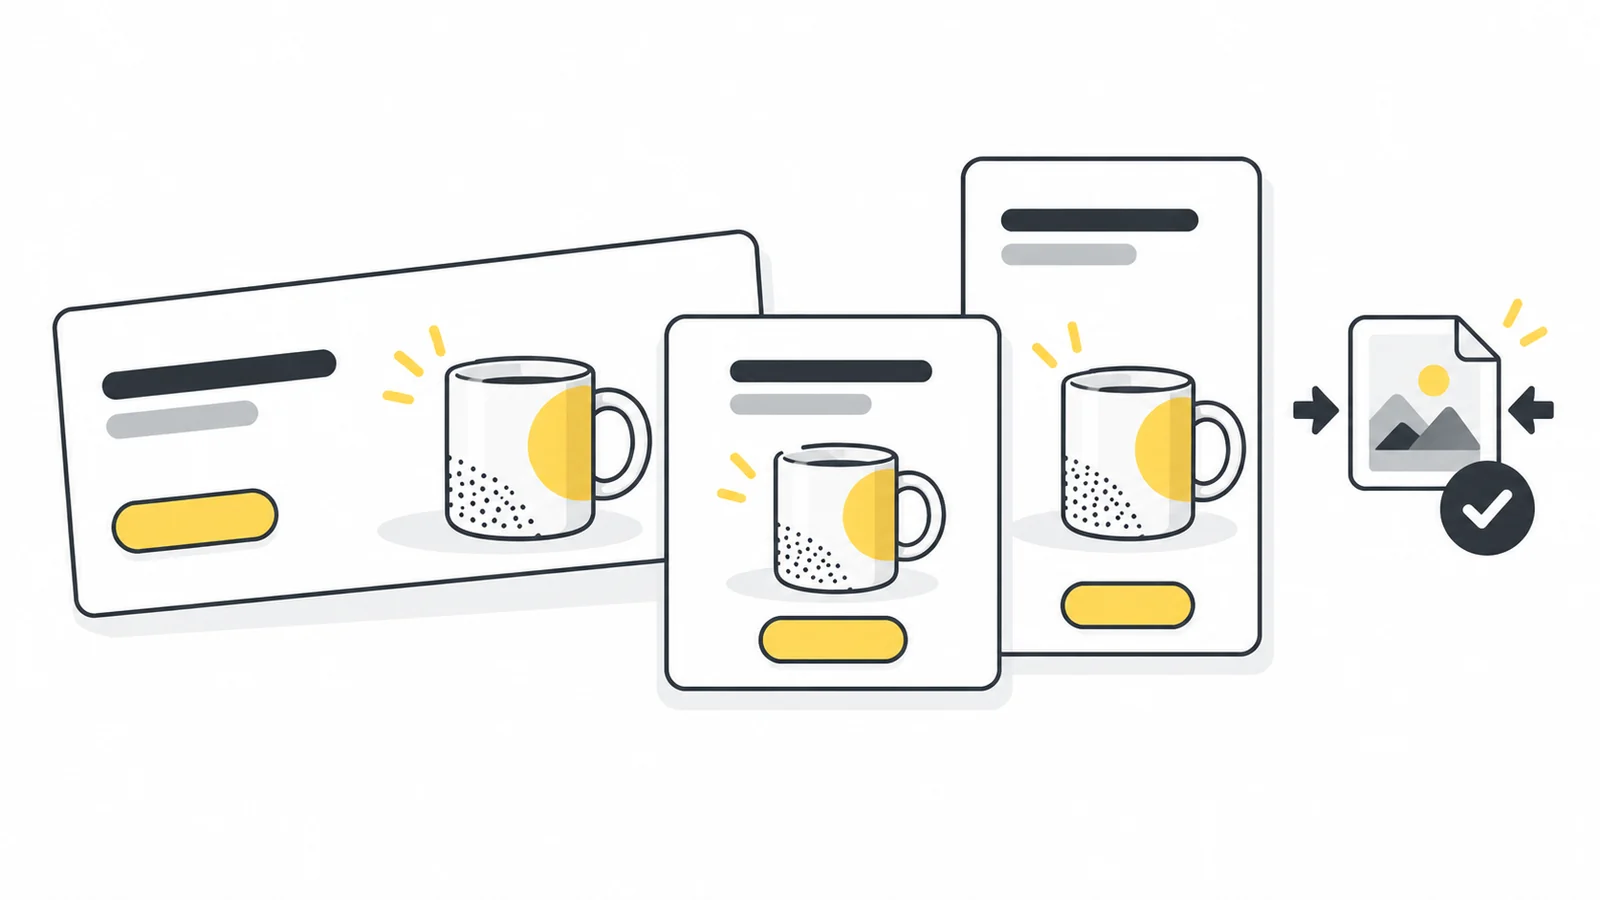
Pixels, aspect ratio and file size are different
| Property | Meaning | Example |
|---|---|---|
| Pixel dimensions | Width and height of the image | 1200 × 628 pixels |
| Aspect ratio | The relationship between width and height | Approximately 1.91:1 |
| File size | The amount of data in the saved file | 240 KB |
Two images with identical dimensions can have very different file sizes. A plain background compresses differently from a detailed photograph. Texture, noise, format and encoding settings all affect the result.
Compression reduces file size. Resizing changes dimensions; cropping removes part of the composition. If an upload rejects the shape, more compression will not fix it. If it rejects the file size, changing the DPI label will not remove pixels or meaningfully reduce the image data.
Keep an editable master and export each version from it. Enlarging a small image adds pixels but does not restore product detail or sharpen lettering that was already blurred.
Google display banner sizes and the 150 KB limit
| Format | Exact dimensions |
|---|---|
| Inline rectangle | 300 × 250 px |
| Large rectangle | 336 × 280 px |
| Half-page | 300 × 600 px |
| Wide skyscraper | 160 × 600 px |
| Leaderboard | 728 × 90 px |
| Billboard | 970 × 250 px |
| Mobile banner | 320 × 50 px |
| Large mobile banner | 320 × 100 px |
Google lists JPG, PNG and GIF for uploaded image ads, with a maximum size of 150 KB. This guide uses static JPG and PNG; animated GIF has additional rules. Some banner sizes have regional availability, so consult the full specification for your campaign.
A 600 × 500 image has the same proportions as 300 × 250, but it is not that banner size. For an uploaded banner, export the exact required width and height. Do not enable automatic dimension reduction to meet the byte limit.
Rebuild the layout for each shape. A narrow leaderboard needs a different arrangement from a tall half-page banner. Shrinking the whole design can make the headline unreadable.
Preparing Facebook and Instagram ad layouts
For Facebook and Instagram, choose the actual placement and ad format in Ads Manager before final export. A feed ad, Story and carousel are separate contexts. An organic-post preset is not proof that an ad meets the current requirements.
The following are working canvases, not verified Meta upload specifications. Meta’s public specification pages required login when this guide was checked. No current Meta minimum resolution or maximum file size is asserted here. Confirm those values in your account or the Meta Ads Guide.
| Layout to prepare | Aspect ratio | Example dimensions | What to check |
|---|---|---|---|
| Square version | 1:1 | 1440 × 1440 px | The selected feed or carousel format accepts this layout |
| Portrait version | 4:5 | 1440 × 1800 px | The selected feed placement accepts this layout |
| Full-height version | 9:16 | 1440 × 2560 px | The selected Story placement accepts this layout; inspect overlays |
Move the headline and product deliberately between versions. Keep essential details away from the edges and inspect each placement preview for interface overlays. Avoid relying on a single universal safe margin. If a portrait crop cuts off part of the product, change the framing or rebuild the layout instead of stretching it.
In Ads Manager, record the accepted ratio, recommended or required pixel dimensions, format and file limit for each selected placement. Then export that version and confirm its preview. This article does not assume static images are accepted in every Reels placement.
JPG, PNG or WebP for ad images?
| Format | Useful starting point | Tradeoff |
|---|---|---|
| JPG / JPEG | Photographs and complex textured artwork | Lossy compression can damage fine print and edges; no transparency |
| PNG | Flat graphics, sharp lettering or transparency | Detailed photographs can produce large files |
| WebP / AVIF | Landing-page images where supported | Website support does not establish ad-upload support |
Compare JPG and PNG for artwork mixing photographs with text. Neither always wins. For your own website, WebP and AVIF can offer more efficient compression, but use an accepted format for the ad upload. See Google’s image-format guidance.
When converting transparency to JPG, choose a background colour and check the product cutout or logo edges. Changing the filename extension does not convert the image.
“No visible quality loss” and “lossless” are different promises. Lossless compression preserves decoded pixels; lossy compression removes information that may or may not be noticeable. A PNG optimiser can preserve pixels, while a PNG-to-JPG conversion is lossy. For the distinction, read lossy versus lossless compression.
Resize and compress an ad image with Pixilo
- Record the destination’s requirements. Identify the ad type, width, height, accepted format and maximum file size.
- Finish the composition. Use Crop Image for precise framing. Reposition baked-in text in the original design editor if the new crop cannot keep it visible.
- Set the dimensions. Use Resize Image with proportions locked after cropping to the required ratio. Alternatively, Social Media Image Resizer offers custom dimensions and a choice between fitting with borders and a centred crop. Inspect the crop rather than trusting the preset name.
- Set a file-size target. Open Compress to a File Size, choose an accepted format and enter a target below the upload limit. For a 150 KB banner, 140 KB leaves a useful margin. Leave resizing disabled when exact dimensions are required.
- Download and inspect the copy. Check dimensions, actual file size and important detail, then inspect the platform’s placement preview.
The file-size tool accepts one JPG, PNG or WebP up to 25 MB and offers JPG, PNG or WebP output. It automatically searches JPG/WebP quality settings; it does not provide a manual quality slider. PNG output cannot use that same quality adjustment. Reaching the target does not guarantee readable text.
Pixilo’s file-size tool uses 1024 bytes per KB, while other services may use different conventions. A 140 KB target is 143,360 bytes, below 150,000 bytes as well as 150 × 1024 bytes. Check the actual saved file and the destination’s acceptance rather than a rounded label.
If the tool cannot reach the target with resizing disabled, try a more suitable format or simplify the original design. If a JPG result fits but its text looks rough, test PNG, increase the available target within the limit, or reduce background texture. Avoid repeatedly compressing the previous JPG.
Measured example: a 970 × 250 banner below 150 KB
We created a fictional mug banner with a textured background, headline and button label, then processed its PNG through Pixilo’s file-size tool on October 10, 2026, in Edge 155.0.4283.45. We selected JPG, a 140 KB target and disabled resizing. This is an illustration of one export, not a photograph benchmark or a live advertising result.
| File | Dimensions | Actual bytes | Decimal KB |
|---|---|---|---|
| Source PNG | 970 × 250 px | 450,998 | 451.0 KB |
| Result JPG | 970 × 250 px | 93,440 | 93.4 KB |
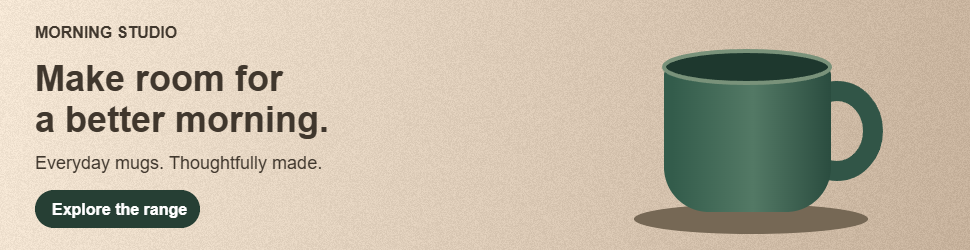
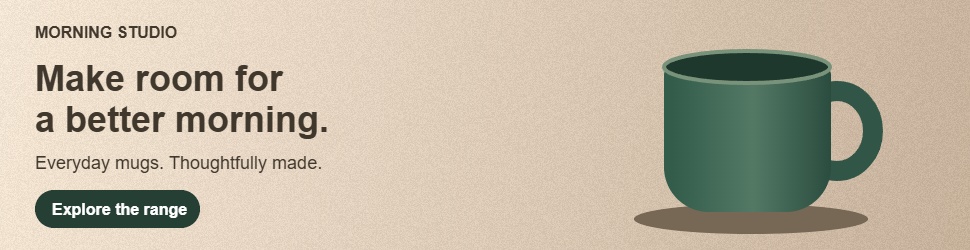
The JPG is about 79% smaller and below the banner limit. The main headline and button wording remain readable in the reviewed local export. Fine background texture and edges change because JPG is lossy; the smaller file is not pixel-identical.
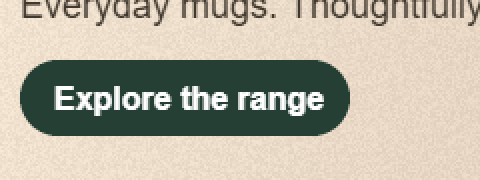
Both details show the same 240 × 90 region enlarged without smoothing. Inspect the lettering and texture, then open the full downloads at their intended display size. These images have not been uploaded to Google or Meta; passing a byte limit is only one part of platform acceptance. Your artwork may need different settings.
Check clarity and the actual placement
Inspect the downloaded image at 100% zoom, where one image pixel maps to one display pixel in the viewer. Look for rough lettering, blocks around edges, banding in gradients and lost product detail. Then view it at its expected display size, especially on a phone. Technically sharp text can still be too small to read.
- Shape: the product, face and headline survive the placement crop.
- Dimensions: both width and height meet the ad type’s rules.
- Format: the actual file type is accepted; it is not merely renamed.
- File size: check the file’s bytes rather than storage allocation or a rounded label.
- Preview: interface overlays do not cover key details and the uploaded result remains clear.
If the upload fails, follow its specific error. A format rejection needs conversion; a dimension rejection needs the right export; a size rejection needs compression. If text fails the readability check, shorten or enlarge it in the design rather than expecting a higher quality setting to fix the layout.
Optimise the landing-page image separately
The ad upload and the page opened after a click have different needs. Your website may benefit from WebP or AVIF and several image widths for different screens. A smaller ad file does not optimise the landing page automatically.
For that workflow, see responsive image sizes for phones and desktops and choosing an image format for your website. Once the ad meets its technical requirements, test the offer, message and composition to assess advertising performance.
Frequently asked questions
Can I use one image for every ad placement?
Only if every selected placement accepts it and its preview keeps the message intact. Separate layouts give you control over crops and text size. A square design rarely becomes a good narrow banner simply by resizing it.
Should every ad image be below 150 KB?
No. The 150 KB limit here belongs to uploaded Google image banners. Responsive display images have a different limit, and other ad types need their own requirements.
What JPG quality setting should I use?
There is no universal number. Different encoders interpret quality scales differently. Start from your editor’s default, export from the original and inspect the result. Pixilo’s file-size tool searches automatically, so judge its download rather than looking for a quality number.
Can compression make my blurry source sharp?
No. Obtain a larger, clearer original or simplify the artwork. Exporting at a larger pixel count cannot recover information that is missing.
Make an ad image that fits
Finish the crop and required dimensions first. Then choose an accepted format and set your target file size. For fixed banners, leave resizing disabled and check the downloaded copy.
Compress your ad image to a file sizePrepare a different layout → ChatGPT
 Grok
 Google
 Perplexity
 Claude