Publishing workflows
Why Are My Canva Downloads Blurry? Find and Fix the Cause
Find why your Canva download looks blurry. Compare real PNG and JPG exports, source-photo resolution and a larger design, with original files to inspect.
A design can look clear in Canva's editor but soft after download. The editor preview, the saved file and the version shown on a website may all be displayed at different sizes. Find where the problem starts before exporting a much larger file.
We tested three real Canva downloads to separate source-photo resolution, available PNG and JPG presets, and larger design dimensions. You can inspect the unchanged files and compare the two PNG sizes at the same displayed width.
First find where the image becomes blurry
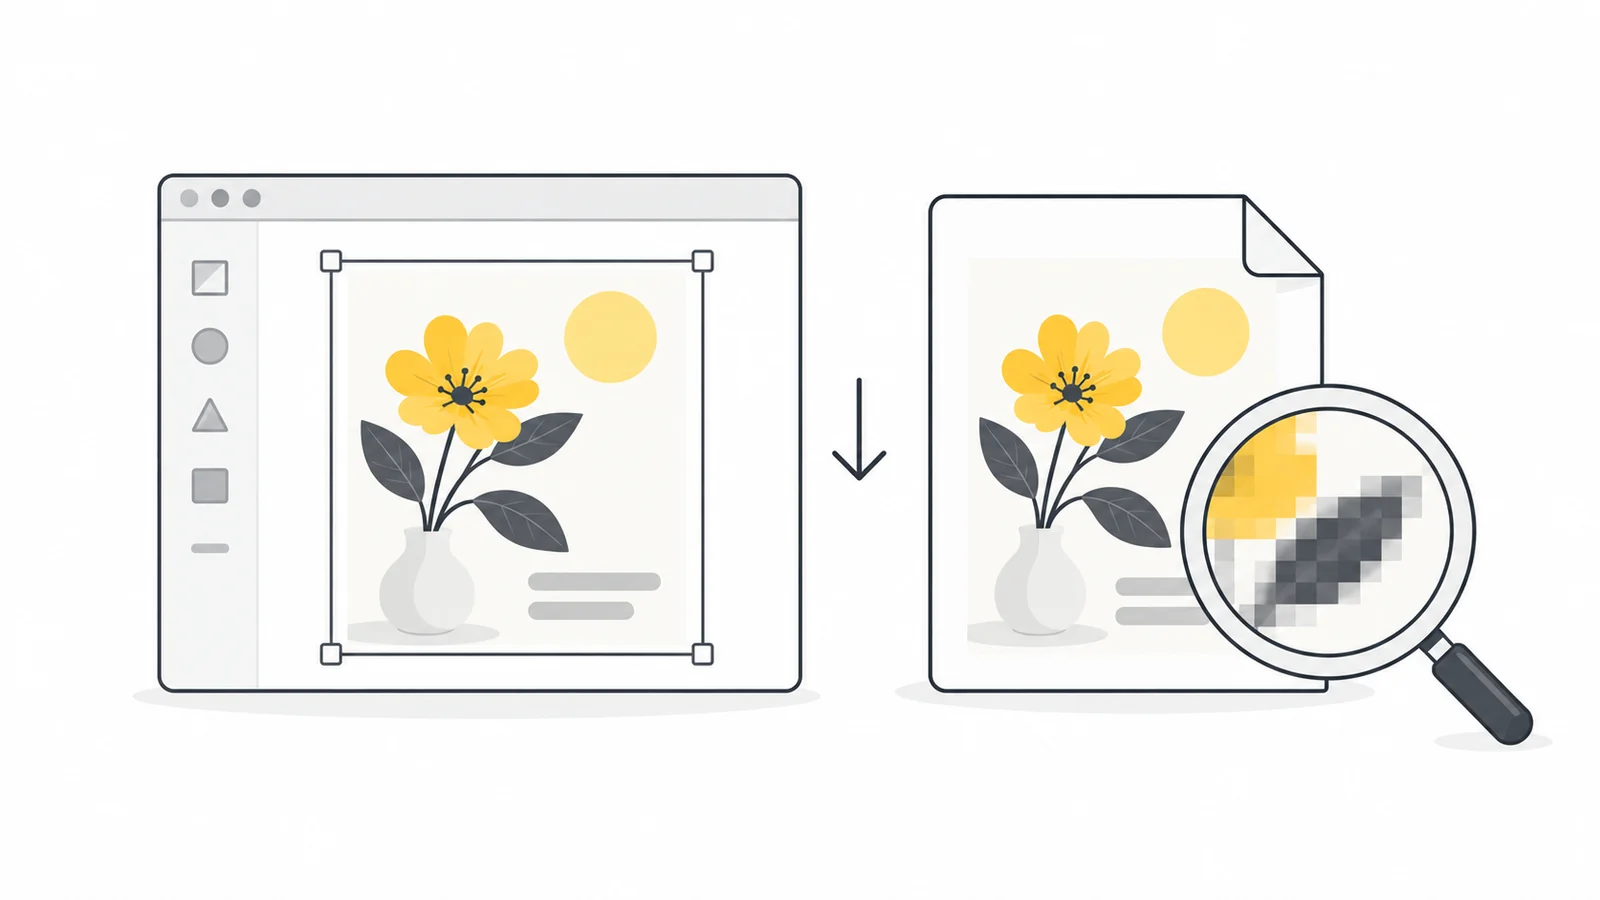
Open the original photo or logo, then the downloaded Canva image, then its uploaded version. Compare an important detail at a similar displayed size: a letter, a cup rim or a product label. A small preview can hide softness that becomes obvious when the image fills a larger space.
| What looks wrong? | Check next |
|---|---|
| One photograph is soft, but Canva text is sharp | Check the photo's original dimensions, focus and crop. |
| Only an uploaded logo looks pixelated | Find the original logo; a screenshot or thumbnail may contain too little detail. |
| Small text looks rough in the download | Compare PNG with JPG, then check the exported dimensions. |
| The file looks fine until you enlarge it | Compare its pixel dimensions with the size at which it will be displayed. |
| The local file is clear, but the uploaded version is not | Check the destination's resizing, compression and selected image version. |
Check effects too. A photograph can have a sharp subject and an intentionally blurred background. Temporarily remove a Canva filter if it may be contributing to the softness; Canva's blurry-design guidance lists filters and source quality among the possible causes.
Fix your download in this order
- Start with the source photo or logo. Replace a thumbnail, screenshot or messaging-app copy with the original. If the subject is out of focus in that original, use another image.
- Check the crop. Zooming into a small part of a photograph leaves fewer source pixels to fill the frame. Loosen the crop or make the photo smaller in the layout if a better source is unavailable.
- Choose a download format. Open Share → Download. For small lettering and sharp graphics, try PNG. For a mostly photographic design, compare JPG as well. Note the available quality setting and any file-size limit; see Canva's download-format instructions.
- Choose dimensions for the destination. Use its required dimensions, or the display-size example below. Download one page with a distinct filename, then check the saved file's actual width and height.
- Check the result where it will be used. Inspect the smallest important text and a focused part of the photo. Change one setting at a time, keeping the layout and crop consistent.
How to check the downloaded pixel dimensions
- Windows: find the downloaded PNG or JPG in File Explorer, right-click it and choose Properties → Details. Under Image, look for Dimensions or Width and Height.
- Mac: open the file in Preview, then open the Inspector with Command–I. In General Info, look for Image size in pixels. Apple's Preview Inspector guide explains the information panel.
Read the pixel width and height, such as 1200 × 800. A file size such as 525 KB tells you how much storage the file uses; a 72 or 300 DPI label is not its pixel width. Check the saved image rather than relying only on the design dimensions in Canva.
How many pixels do you actually need?
Suppose a website displays your image 600 CSS pixels wide. A 600-pixel-wide export provides one image pixel per CSS pixel. A 1200-pixel-wide export provides two, which can help lettering look clearer on a display using two device pixels per CSS pixel. Keep the aspect ratio: for a 3:2 design, those candidates would be 600 × 400 and 1200 × 800.
This is a starting point for comparison, not a rule to double every image. Check the actual destination and device. A photograph may already look satisfactory at 600 pixels; small text may benefit from 1200. A platform may resize either upload. Keep the smallest version that looks clear at its intended size.
Our test files are 1200 × 800 and 2400 × 1600. At a 600-pixel display width, they supply two and four image pixels per CSS pixel respectively. The larger file is therefore not automatically the sensible choice. Switch between them below to judge the difference on your screen.
If your account does not offer the larger download you need, you can create a new custom-size design and copy the editable content into it, scaling it proportionally. Check the layout and photo crops afterward. If the text is still too small to read, enlarge the text within the design or simplify the layout: extra export pixels do not make the words physically larger at the same displayed width.
What we tested in Canva
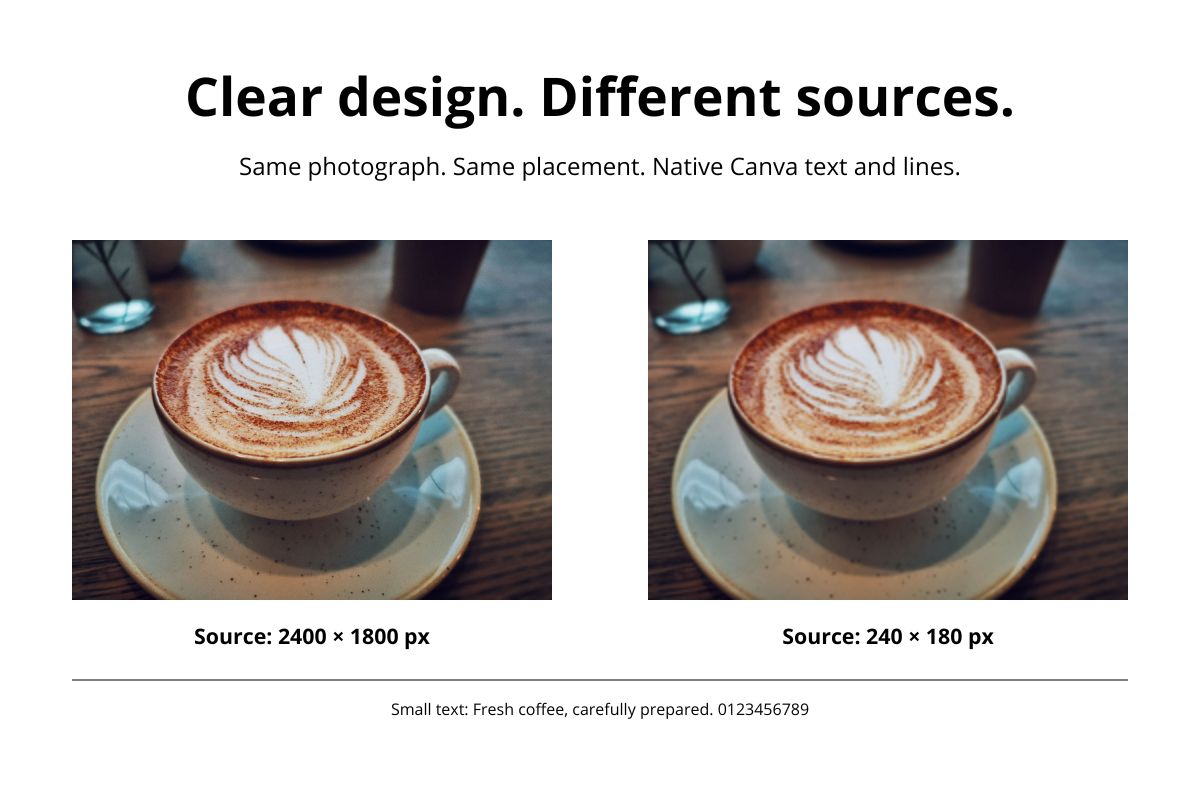
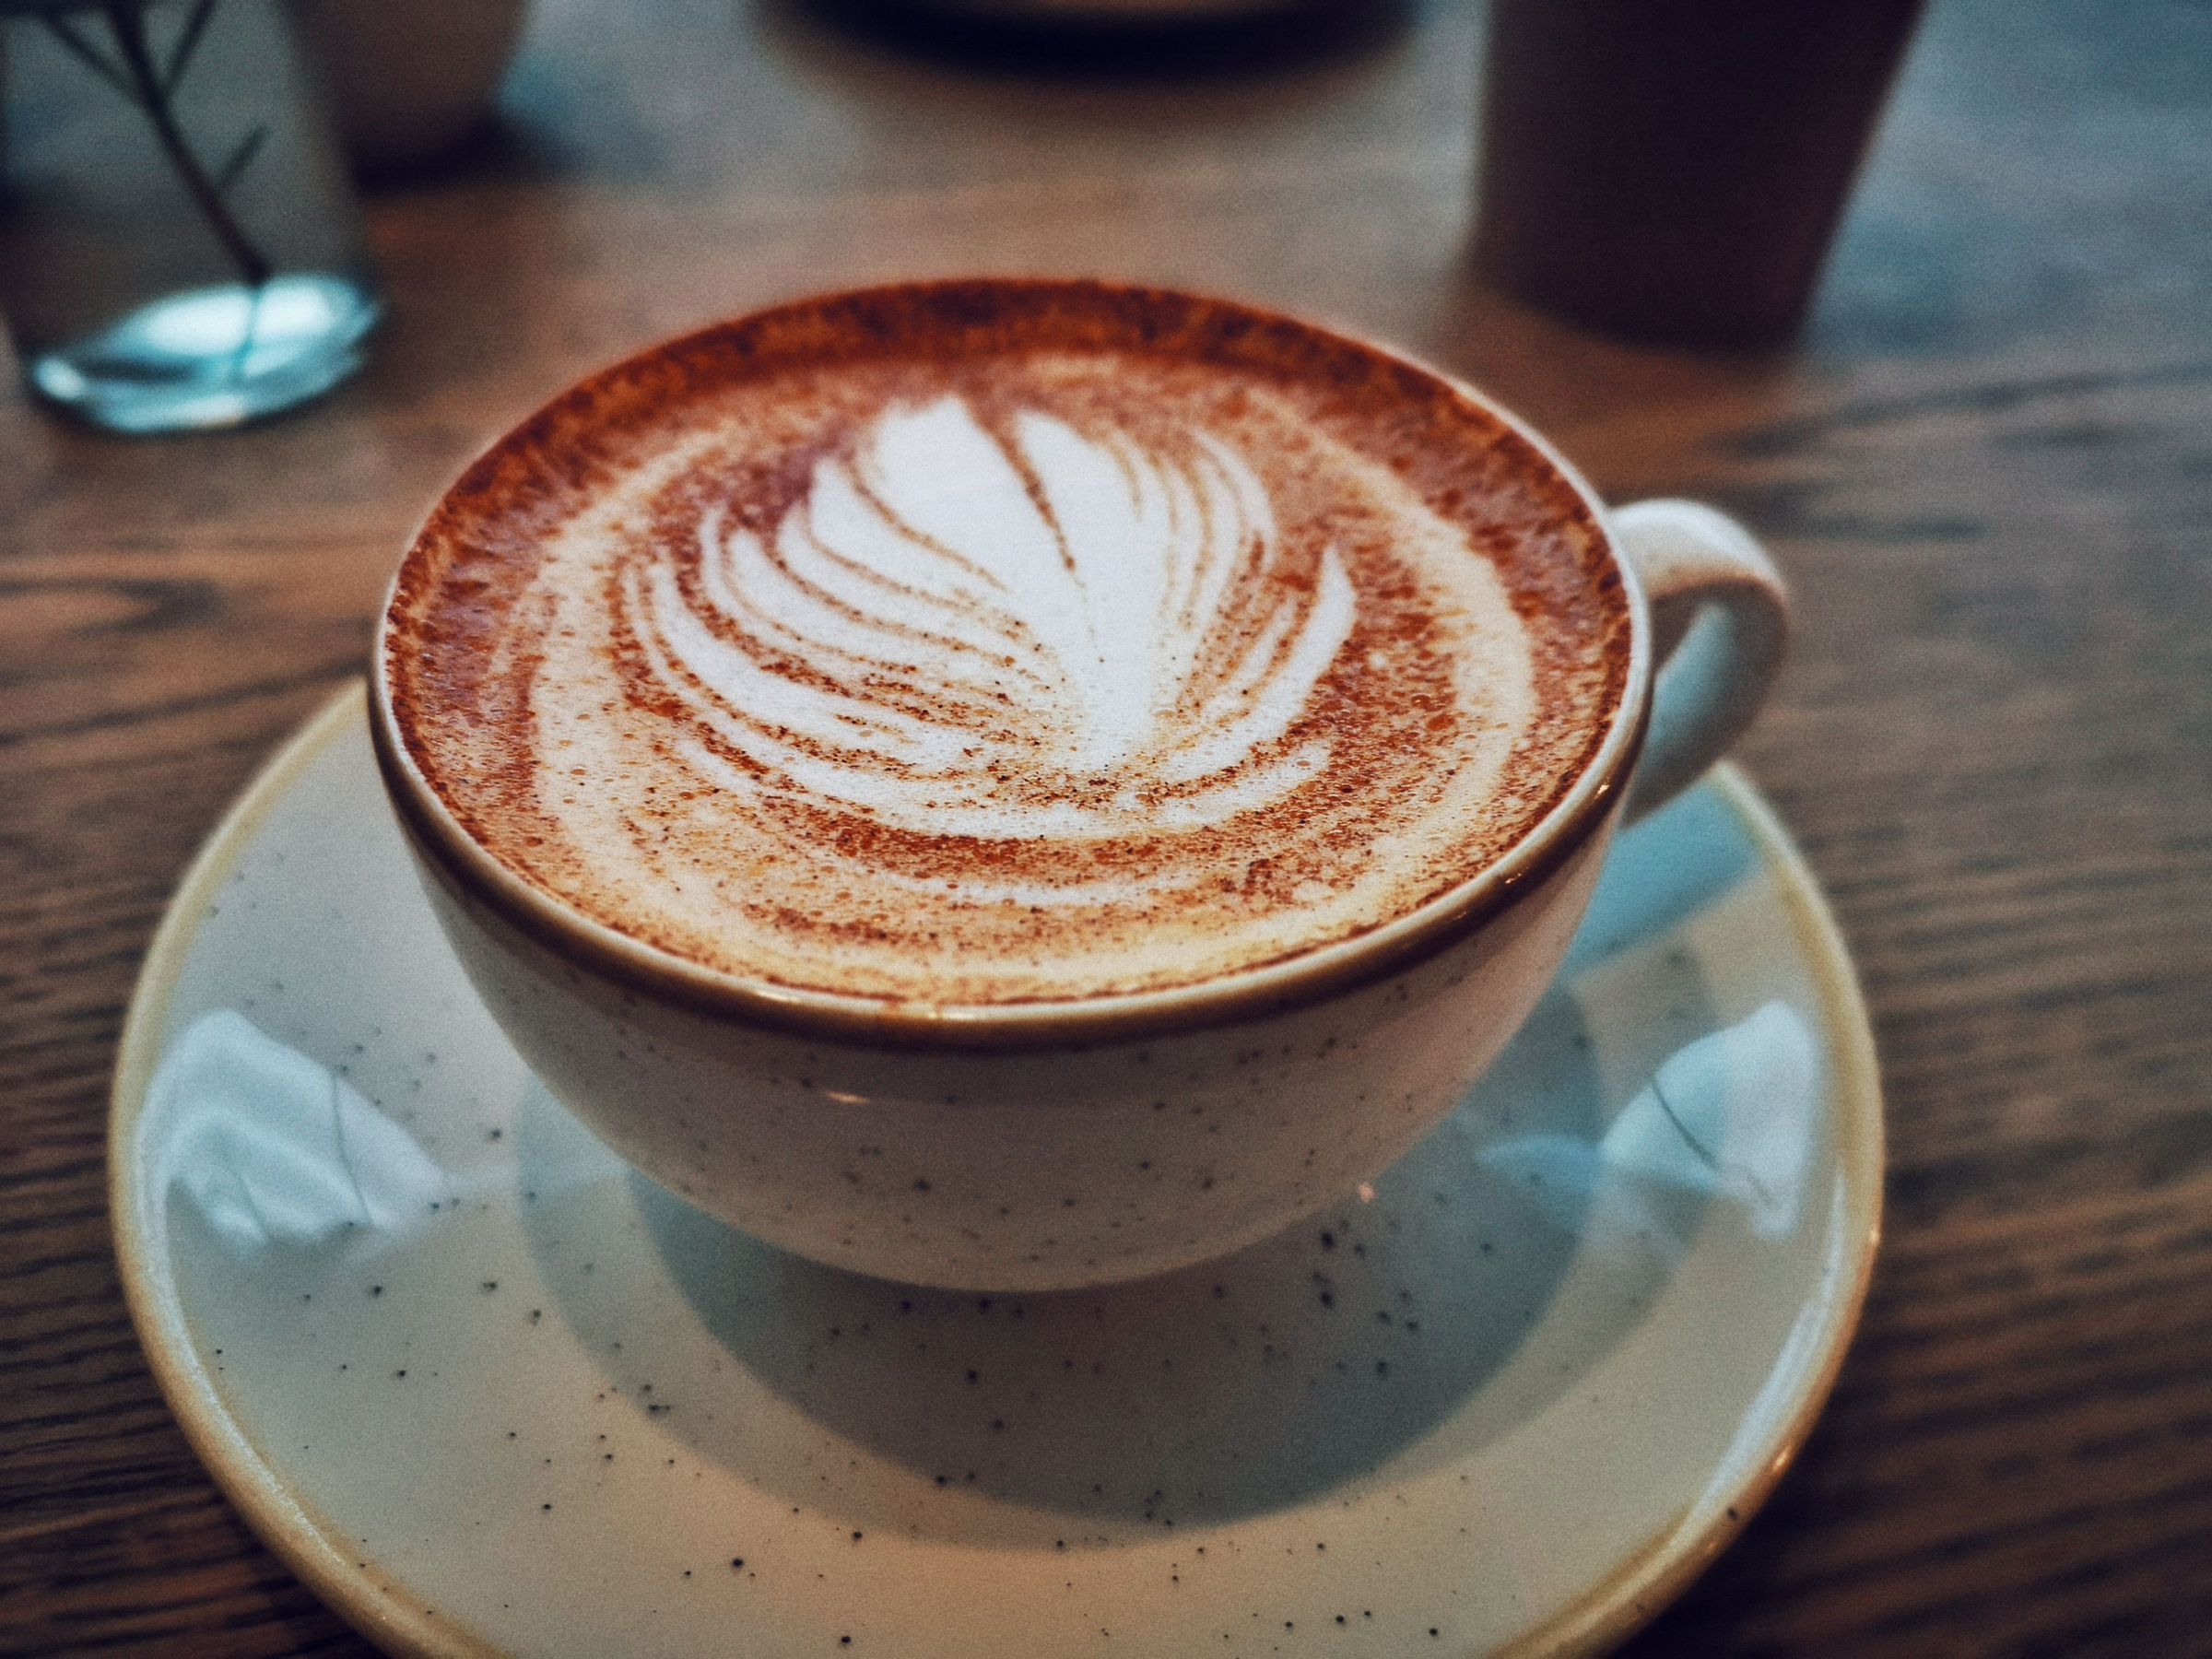
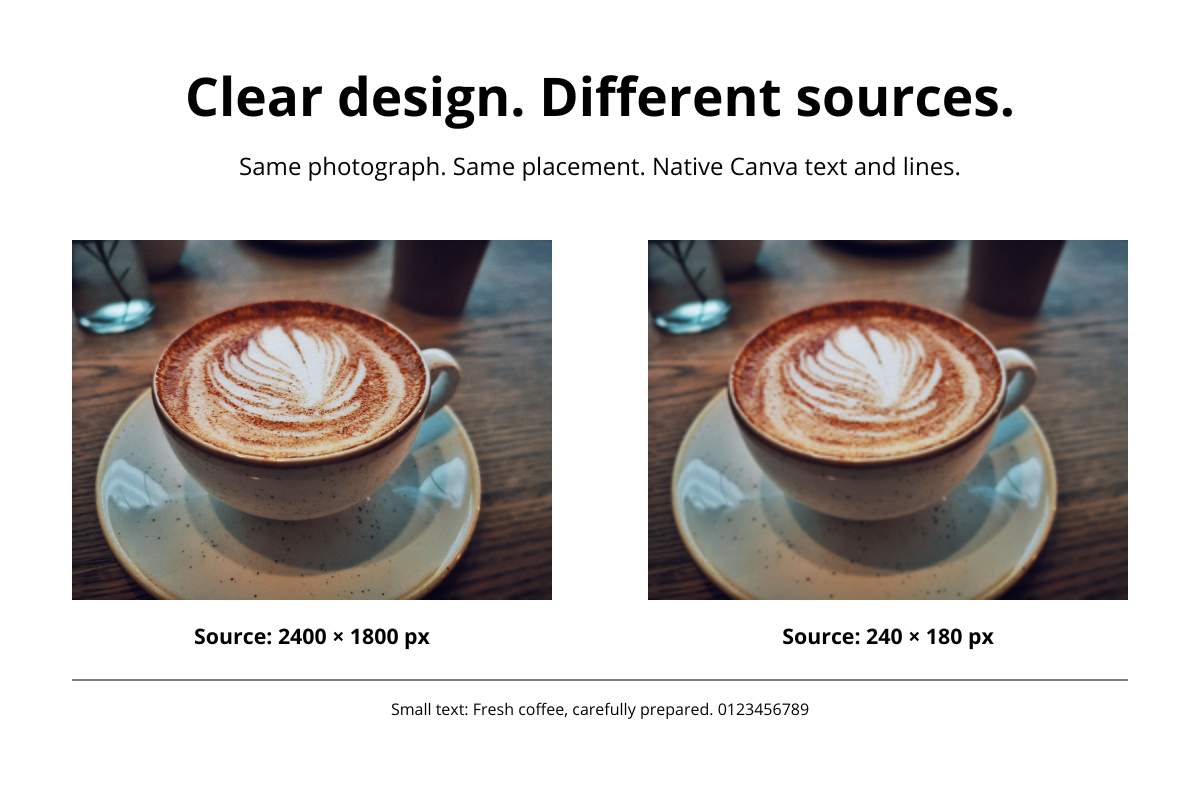
On 21 October 2026, we downloaded a 1200 × 800 design containing editable text and two copies of the same coffee photograph. Each photo filled a 480 × 360 area. One source was 2400 × 1800 pixels; the other was only 240 × 180. We also made a proportionally scaled 2400 × 1600 version from the editable design.
| Download | Dimensions | Setting | File size |
|---|---|---|---|
| PNG | 1200 × 800 | High, size 1× | 524,522 bytes |
| JPG | 1200 × 800 | Medium, size 1× | 95,957 bytes |
| PNG, larger design | 2400 × 1600 | High, size 1× | 1,778,250 bytes |
PNG High and JPG Medium are different presets, not equal-quality settings for a format benchmark. Selecting JPG High required Canva Pro on this account. The larger PNG came from a separate larger design, not Canva's Pro download-size slider. These results describe one design and one photograph.
Test preparation and how to reproduce it
Both photo inputs came from the same existing JPG, resized and saved as PNG to avoid another lossy JPG save during preparation. The Pexels sample was previously supplied for our guides; see the Pexels license. Download the 2400-pixel source or 240-pixel source. Both photos use the full composition with identical placement dimensions and no effects.
The design contains five editable Open Sans text boxes, two photos and a horizontal line. To make the larger version, we copied all eight elements as a group, doubled the group's dimensions with its aspect ratio locked, and doubled its position coordinates. This kept their relative layout intact and let Canva render the editable text again. We did not enlarge the downloaded PNG.
The linked original downloads are unchanged. Comparison figures are saved as PNG; their captions identify any crop or enlargement. The measurement record includes dimensions, exact byte sizes, file hashes and crop coordinates.
Comparison 1: a larger export does not repair a small source photo
The 240-pixel photo had to fill a 480-pixel-wide space in the first design and a 960-pixel-wide space in the larger one. It filled the frame, but the fine texture missing from that source remained missing.
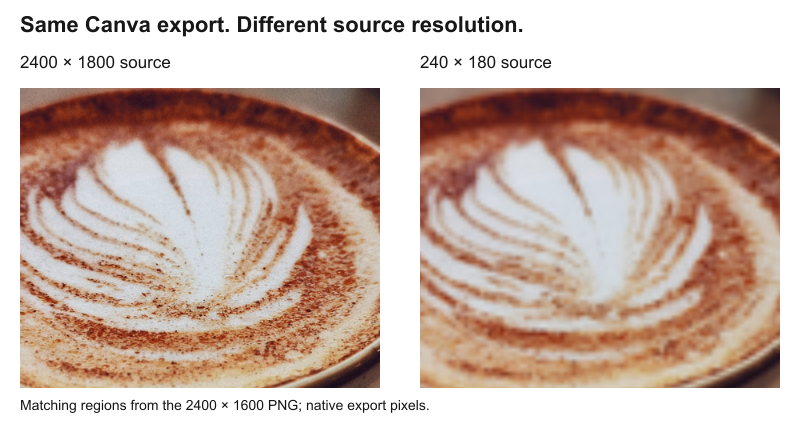
The larger source retains more detail in the focused coffee surface. For this problem, a better original, a less aggressive crop or a smaller photo placement helps more than changing the final format. Even a large original can be insufficient if the design uses only a tiny part of it: consider the pixels remaining in the crop.
Comparison 2: PNG High versus JPG Medium
These downloads contain the same 1200 × 800 design. PNG High produced a 524,522-byte file; JPG Medium produced 95,957 bytes, about 82% less in this example. That saving comes with a different preset and lossy encoding, so judge the result rather than treating the percentage as a general promise.
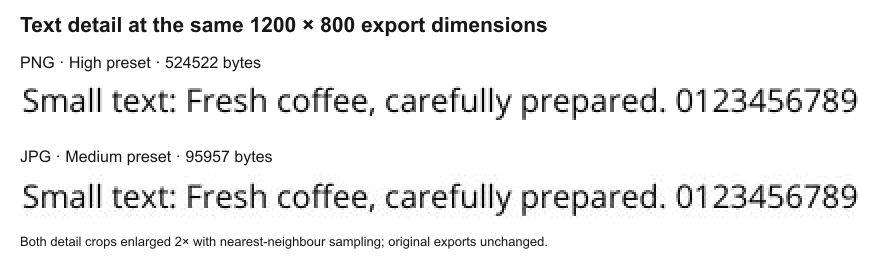
Both remain readable, and the difference is less dramatic than the source-photo example. JPG can change detail around text and sharp boundaries; PNG's compression is lossless, but cannot undo changes made while Canva rendered the design. MDN's image-format reference explains the distinction. For text-heavy graphics, compare PNG; for photographic content, a suitable JPG may offer a better balance of clarity and file size. Our test does not establish what JPG High would produce.
Comparison 3: does the larger design look better where you use it?
Start with ordinary viewing. Switch between the unchanged PNG downloads below. Both occupy the same space, up to 600 CSS pixels wide, with normal browser smoothing. On a narrow screen, both shrink to fit. Browser zoom and display density affect what you see; check the device and size relevant to your use.
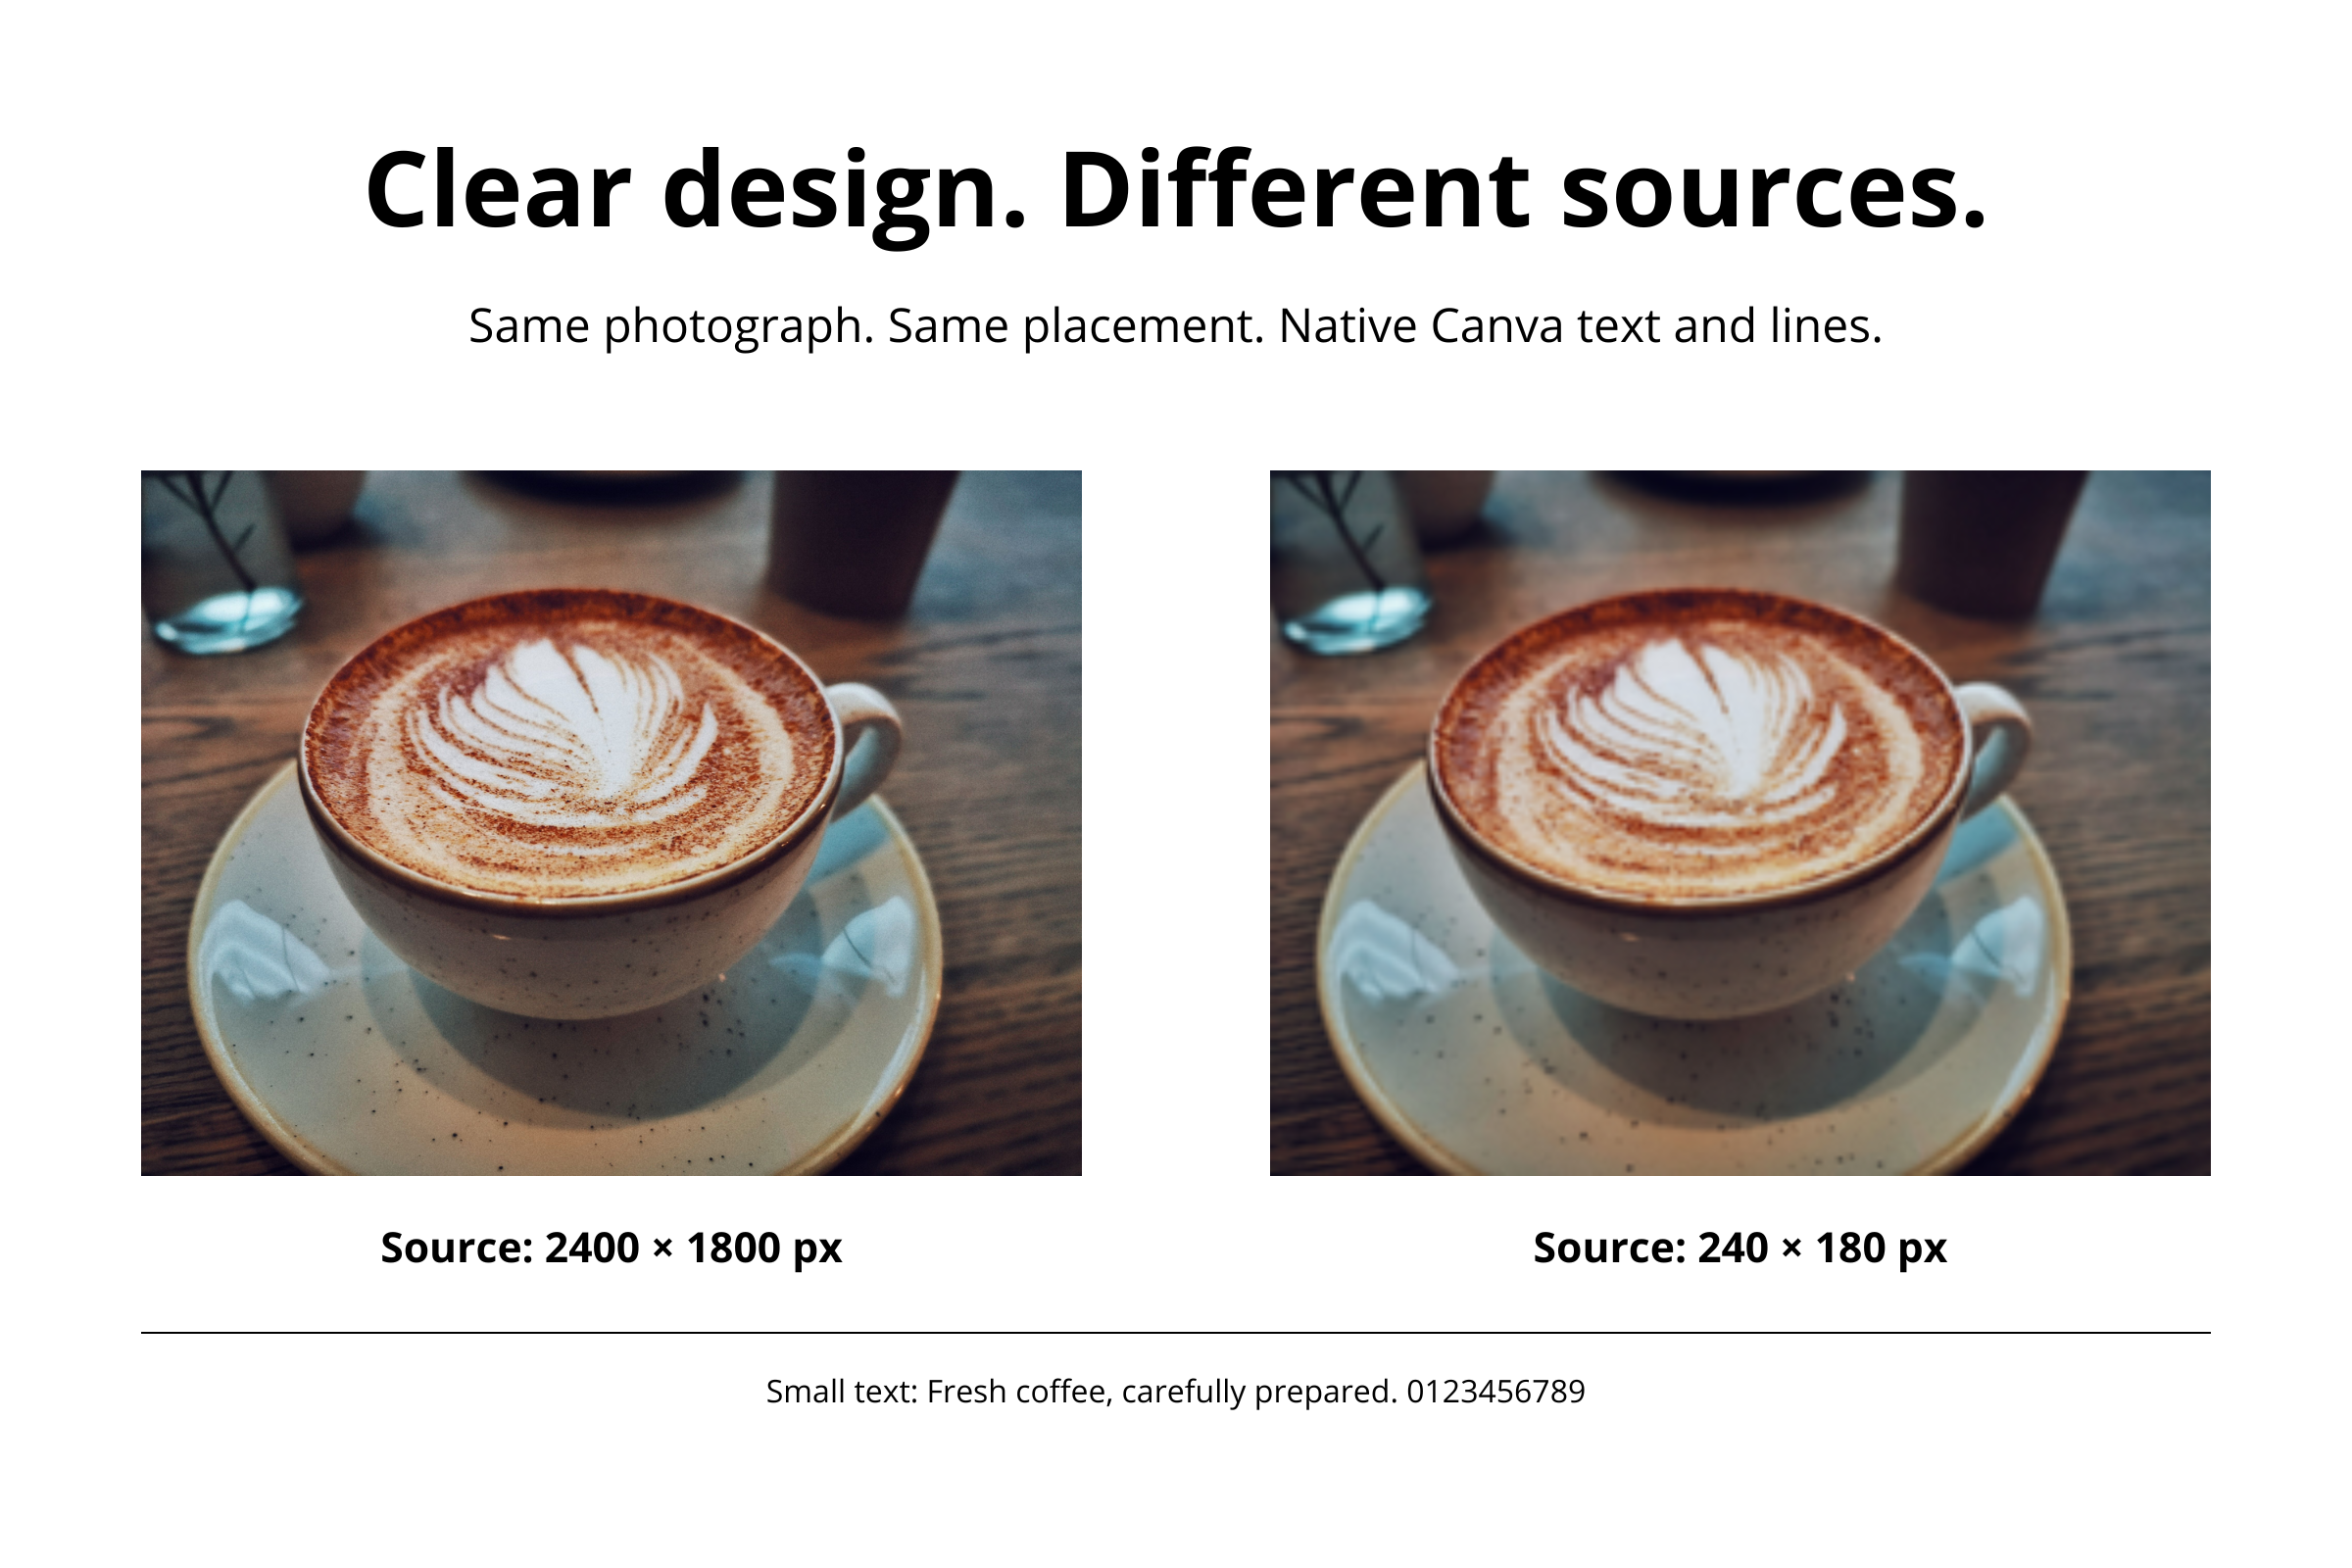
If you see little useful difference at this size, the larger download may not justify its extra bytes. It contains four times as many pixels and takes about 3.39 times as much storage. Also check whether the smallest text is actually comfortable to read; a smoother but tiny word still needs a layout change.
A closer look at the text
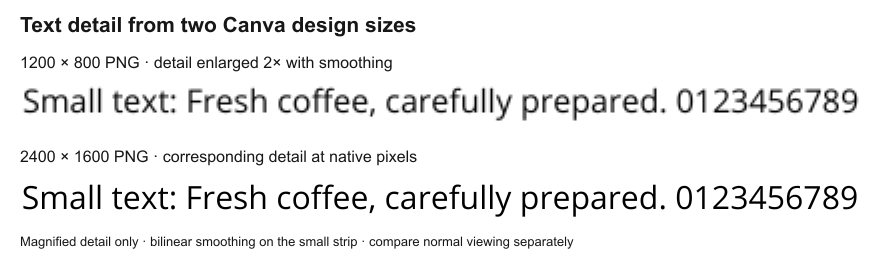
The larger design gives Canva more pixels to render its editable lettering. The smaller strip below is smoothed rather than enlarged into hard pixel blocks. Text inside an uploaded screenshot cannot be rendered again as editable text; enlarging it has the same source-detail limitation as enlarging a small photo.
If the download is clear but the uploaded version is blurry
Keep the local download as your reference and compare the version the destination actually displays. A website may stretch a small thumbnail; a social platform may resize or recompress an upload. Another larger Canva export may not help if the destination still serves a small version. Our blurry website image guide explains those checks; optimizing Canva images for websites covers the wider preparation workflow.
Once the export is clear, prepare a smaller copy if needed. Use the image resizer for oversized dimensions, the image compressor to test compression, or Compress to a File Size for a byte limit. Inspect the result and keep the clear original.
Frequently asked questions
Does Canva Pro automatically fix blurry downloads?
No. Extra size or quality controls may help when the export is the limiting factor. They cannot replace a sharp source or make tiny text physically bigger at the same display size. Check which part of the image is soft before deciding whether you need an additional feature.
Will changing the DPI make my Canva image sharper?
A DPI label alone adds no picture detail. For digital use, compare pixel dimensions with display size. For print, also consider the physical size and printer's requirements; see DPI, PPI and pixels.
Can I enlarge the downloaded PNG instead of returning to Canva?
You can resize it, but the added pixels are estimated from the saved image. Editable Canva lettering can be rendered again at a larger size; lettering already baked into a PNG cannot. Return to the editable design when you need more export pixels.
Should I use PDF Print and convert it back to an image?
Use PDF Print when you need a print document. For a JPG or PNG destination, converting a PDF introduces another step and does not guarantee better image quality. A low-resolution photo can remain soft inside the PDF. First test a direct image download at appropriate dimensions.
Keep the clear original, then prepare a smaller copy
After checking the Canva download at its intended size, reduce unnecessary bytes and inspect the result again.
Compress a clear exportReduce oversized image dimensions → ChatGPT
 Grok
 Google
 Perplexity
 Claude