Website images
How to Prepare Screenshots for Tutorials and Documentation
Create clear tutorial screenshots: capture readable text, crop distractions, cover private details and choose image dimensions and formats for publication.
A useful tutorial screenshot answers a specific question: where should I click, which setting should I choose, or what should the result look like? A sharp image of an entire desktop can still be unhelpful if readers cannot find the relevant control.
The aim is to explain the step without distractions, private information or an unnecessarily large file. This guide takes you from preparing the screen to checking the final image in a help article, tutorial or internal document.
Decide what each screenshot needs to explain
Write the instruction before capturing the image. “Select Export, then choose PNG” gives you a clear subject. “Here is the settings screen” leaves the reader to work out what matters.
Choose the moment that best supports that instruction. A menu may need to be open to show the available options. A result image may need to show the confirmation message after the action. If one screenshot tries to show the starting screen, a menu and the finished result at once, separate the steps.
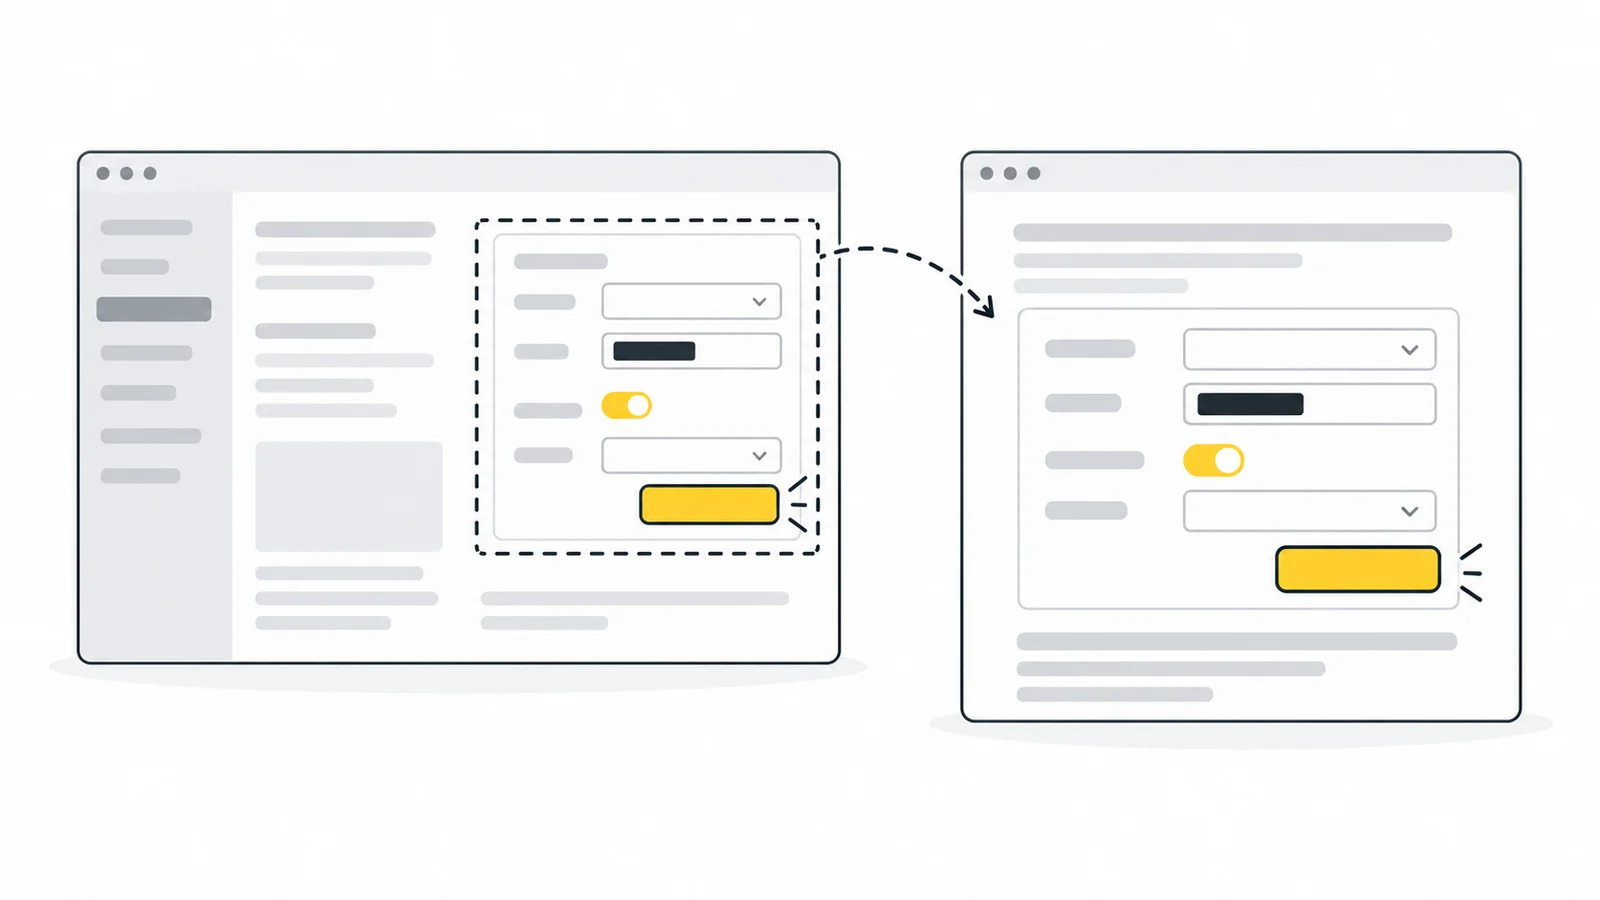
Keep enough context for orientation. A crop showing only a switch may be small, but readers cannot locate it if the surrounding panel title is missing. Include the nearest useful heading or navigation label, then remove unrelated parts of the window.
For a long workflow, plan a short sequence in which each image adds information. You rarely need another screenshot for every click if the written instruction is already unambiguous.
Capture a clean original
Prepare the application before taking the screenshot. Use a demonstration account or sample project, close unrelated tabs, dismiss notifications and set the window to a sensible size. A narrow window may show a different navigation layout from a wide one, so capture the interface your instructions actually describe.
- On Windows: use Windows + Shift + S to capture a selected area. The Snipping Tool also offers window and full-screen capture modes. See Microsoft's capture instructions for the available controls.
- On Mac: use Shift + Command + 4 to select an area, or Shift + Command + 5 for screenshot controls. Apple's screenshot guide explains the capture options.
Save the original image file. Taking a screenshot of an image inside a chat app, or downloading its small preview, introduces another opportunity to lose detail. Photographing the monitor also adds glare, distortion and background clutter that a direct capture avoids.
If the interface text is too small even in the capture, adjust the application or browser zoom before trying again. Confirm that the zoom has not hidden controls or changed the layout in a way that makes the instructions misleading. Enlarging the saved image cannot recover letters that were never captured clearly.
Remove private information before sharing
Before sharing, check the whole window for private details, including the browser address, tab titles, account menu, sidebars and notifications. Sample records in the main panel do not protect an email address still visible in the account menu.
When the original already contains private details, crop them out if they are outside the useful area. For details that must be removed from within the screenshot, use an opaque solid cover. Pixelation and blur can leave clues about the underlying content and are poor choices for confidential text.
- Open the image in Pixelate Image. Under Effect, select Solid cover.
- Position the cover over the sensitive area. Adjust the selected rectangle in the preview, leaving a small margin around the text so the tops or edges of characters do not remain visible.
- Select Add area for each additional cover. An email address might appear in both a form field and the account menu. Cover each occurrence, including any codes or QR images that expose the same information. Moving an existing cover to a new location does not protect both places.
- Download the PNG and open that file. Inspect the saved result, not just the editing preview.
The downloaded PNG contains the cover in its image pixels. Share this edited copy, not an editable document with a removable rectangle on top of the original image. Keep the unedited source out of any public download folder.
This step protects the visible areas you cover. It does not remove information elsewhere in your document, clipboard, account or source files. For a fuller explanation of the choices, read how to pixelate or cover parts of an image.
Crop first, then add only useful emphasis
Use Crop Image to remove unrelated navigation, empty margins and desktop space. Keep the control's label and enough of its surroundings to identify the location. A small crop can reduce the file's size while making the instruction easier to see.
Choose the final crop before adding markers, so an annotation does not end up pointing at something you later remove. Keep the panel title or another useful location cue; a floating arrow beside an unidentified button gives readers little help.
If the target is still difficult to spot, add a simple outline or numbered marker in an editor that supports annotations. Keep the mark away from the label and explain its meaning in the accompanying text. Pixilo's crop tool changes the visible area; it does not add instructional arrows or labels.
Use the same annotation style throughout the tutorial. If you number several actions in one image, make sure those numbers match the written sequence. Do not rely on a colour alone to identify an instruction: “Select the button marked 2” is clearer than “Click the green area.”
Choose dimensions for the actual reading size
Judge the image inside the finished article or document. A screenshot that is readable in a full-screen image viewer can become difficult to use when squeezed into a content column.
Separate two questions: how large is the interface text on the page, and does the image contain enough pixels to draw that text sharply? More source pixels can improve sharpness without making the letters look larger.
For example, an 800 × 500 CSS-pixel view captured at 2× density can produce a 1,600 × 1,000 image. Displaying that image at 800 × 500 CSS pixels preserves the original interface's apparent size. It does not automatically make the text half as large. Displaying the same complete view at 400 CSS pixels wide would make its labels smaller.
The numbers depend on the capture method, screen scaling and zoom. MDN's explanation of pixel density describes the relationship between CSS and physical pixels. Check the actual saved dimensions rather than assuming that every capture is 2×.
Before reducing the dimensions, try a tighter crop. On a phone, the same 800-pixel-wide view may shrink into a column only about 360 CSS pixels wide. A small menu label can become unreadable even when the source is technically sharp. Split a large view into focused images where necessary, or offer a larger version readers can open.
Use Resize Image with the aspect ratio locked when a source is unnecessarily large. Compare the resized copy with the original at the intended display size. If the smaller file removes information readers need, retain more pixels or simplify the composition.
Keep text sharp when choosing the file format
Start with PNG for fine text and interface controls; its lossless compression avoids adding JPG-style compression damage. Try PNG optimization before changing the dimensions. For a screenshot dominated by a photograph, a JPG or WebP comparison may be worthwhile.
Compare exports made from the same prepared source, at the same pixel dimensions and display size. Inspect a small letter, a thin divider and the edge of an annotation. Look for smudging, missing punctuation or a halo around a label, then compare file sizes. If the smaller export changes a detail readers need, keep the clearer one.
For the differences between formats, see our JPG versus PNG guide and MDN's format reference. Make new comparisons from the prepared source, not from an already compressed download.
Working with large screenshots
Pixilo's crop and pixelation tools accept one JPG, PNG or WebP up to 25 MB. A very tall page capture can be cumbersome to edit and difficult to read. Capture or split the relevant sections in your screenshot application first if the original exceeds a tool's limits.
Publish instructions people can follow without the image
Keep essential actions in normal text beside the screenshot. Readers may use a screen reader, enlarge the text, print the guide or encounter an image that fails to load. “Open Settings, choose Billing, then select Download invoice” remains useful in all of those cases.
Write alternative text that explains what the image contributes in context. For example: “Billing settings with Download invoice highlighted beside the latest payment.” You do not need to transcribe every sidebar item when it has no bearing on the task. The W3C guidance on informative images explains why the image's purpose determines its text alternative.
A caption can explain something visible that readers might otherwise miss, such as which version of the interface is shown. Keep the screenshot, caption and instruction close together. A sequence is harder to follow when several images are grouped far below the steps they illustrate.
On a website, preserve the image's proportions and prevent it from overflowing the content column. Our responsive images guide covers the implementation. After publishing, check that your website editor has not substituted a small thumbnail for the intended image.
Example: show someone how to download an invoice
Suppose your instruction is “Open Settings, choose Billing, then select Download invoice beside the payment.”
- Prepare the view. Open Billing with sample payment records. Keep the relevant payment and its download button visible, and close unrelated menus.
- Capture and crop. From a 1,600 × 1,000 capture, a 1,200 × 700 crop might retain the Billing heading, latest payment and button while removing the unrelated sidebar. Keep the original privately.
- Cover any remaining account details. If the account email is still real, apply Solid cover. Add another area for any second occurrence, then download and inspect the PNG.
- Add emphasis if needed. In an annotation editor, outline the download button without covering its label. Save a PNG copy and use a consistent marker style.
- Check it in the article. Displaying the 1,200-pixel crop at 600 CSS pixels provides 2× image detail. On a phone, check whether the payment row and button label remain readable. If not, show a closer view of that row rather than shrinking the entire screen further.
- Publish with the instruction. Put the action in normal text beside the image. Confirm that the page uses the edited PNG and that any full-size link also opens the protected copy.
The useful comparison is whether a reader can locate the right payment and button. The amount of desktop space removed is secondary to that goal.
Find the cause of a poor result
| Problem | Useful next step |
|---|---|
| Text is blurred in the original capture | Capture the interface again at a readable zoom. Check the actual saved original rather than a preview inside another app. |
| Text is sharp locally but tiny in the article | Check the image's displayed width and whether the page restricts it unnecessarily. Use the dimension-planning steps above to choose a more focused view if needed. |
| Letters have halos or blocky edges | Return to the original capture and try PNG. Check whether a lossy export or repeated conversion caused the damage. |
| Only the published image looks soft | Check the file or image variant selected by the website editor and whether it is being enlarged. |
| Readers cannot find the control | Include a nearby panel title, simplify the crop and make the written action more specific. |
For a final review, follow the published instructions as if you have never used the feature. Check that the labels in the screenshot match the written steps and that each image appears beside the action it explains.
Frequently asked questions
Should every tutorial step have a screenshot?
No. Use one when it clarifies location, choice or outcome. A short written step may be enough for a familiar action. Unnecessary images add scrolling and more interface examples to maintain when the software changes.
Is a full-page screenshot useful for documentation?
It can show overall structure, but it is usually difficult to use for a specific control. Keep an overview if it serves a purpose, then provide focused captures for the actions that need readable detail.
Should I include the mouse pointer?
Include it only when its location helps explain the action. A pointer covering a label can make the screenshot harder to read. For a control that is difficult to find, a clear outline and written instruction are often easier to follow.
How do I keep screenshots useful when the interface changes?
Capture only the context needed for the task, record the relevant product version or review date where useful, and revisit screenshots when labels or navigation change. Check the instructions at the same time; updating the image alone may leave an incorrect step.
Make your screenshot easier to follow
Crop to the useful part of the screen, then cover any private details before publishing the saved copy.
Crop a screenshotCover private details → ChatGPT
 Grok
 Google
 Perplexity
 Claude