Website images
How to Combine Images for Your Website
Combine website images into a clear collage. Choose a layout, adjust crops and spacing, and check mobile readability with a practical four-photo example.
Should you combine the images or keep them separate?
A collage puts several pictures into one image file. It can give a project page a compact overview or show a subject beside a useful detail. The pictures should answer a shared question, such as how a finished kitchen looks and how its storage works.
Keep images separate when each needs its own explanation, link or close inspection. A product gallery lets visitors examine individual views instead of looking at a small grid.
A collage keeps its arrangement as it gets smaller. Separate pictures in your website editor may stack on a phone; pictures combined into one file stay in their fixed positions. This makes a collage predictable, but gives the page less flexibility to display each photograph at a useful size.
Choose images that add different information
Two to four images are a practical starting point for a project summary. Give each one a job: an overview establishes the setting, while a closer view shows a feature that would otherwise be hard to see. Two nearly identical overviews usually add less than an overview and a useful detail.
Look for lighting and colours that work together. For a before-and-after comparison, use similar camera angles, framing and scale so the change is easy to judge. Avoid crops that hide a relevant difference. Our guide to choosing website images covers what each image should communicate.
Choose a layout that fits your images
| Layout | Useful for | What to check |
|---|---|---|
| Side by side | Two views or alternatives that readers should compare. | Both subjects remain clear at the same displayed size. |
| One below another | A short sequence that readers follow from top to bottom. | The combined image does not become unnecessarily long. |
| Grid | Several views that deserve similar attention, such as four project photos. | Each picture still has enough room to show its useful detail. |
| One large image and two smaller ones | An overview supported by two details. | The large image explains the main subject; the smaller ones add information. |
In Pixilo's three-image layout, the first image is large on the left and the next two are stacked on the right. Change the order to choose which photograph gets the most space. A regular grid fills from left to right, then top to bottom; if the image count does not fill every cell, the remaining space uses your chosen background.
Match the overall shape to the picture frames
The collage's width and height determine the shape of the frames inside it. A square collage does not necessarily give you square frames: two pictures side by side each occupy a tall frame, while a 2 × 2 grid gives each picture an approximately square frame when the gaps and margins are small.
For two portrait photos side by side, try a taller overall collage so each frame stays upright. Making that collage wide and shallow crops more from the top and bottom when you fill the frames. For two landscape photos in a row, a wider collage can preserve more of each scene.
Start with the space available on the page, then try a layout and overall shape that suit the photos. If your website requires a fixed shape, keep that shape and change the layout or image selection instead. In Pixilo, unlock the aspect ratio to change the shape; lock it again once you want to resize the arrangement without changing its proportions.
Show the whole image or fill its frame?
Show the whole image keeps every edge visible and may leave space around a picture. This is useful for logos, diagrams or a product photo where cutting off the subject would remove important information.
Fill the frame crops the picture to fill its space without stretching it. This gives a photo grid consistent edges, but you need to check what disappears. Select each thumbnail and adjust the crop position to keep the important subject in view.
If a frame cannot show both a face and the activity beside it, try a different overall shape or layout, show the whole image, or choose another photograph. Moving the crop cannot make every part of a wide scene fit into a narrow frame. Use the crop tool first if you want a more precise crop of the original, then check how that crop fits in the collage.
Use spacing to separate the pictures
A small gap helps readers distinguish neighbouring photos. An outer margin gives the collage a border, but also reduces the space available for the pictures. Keep both modest when the collage will appear in a narrow column; they shrink along with the image when it is displayed at a smaller size.
Choose a background that works with the photos and the page. It appears in gaps, margins and any space left by images that do not fill their frames. Changing this colour, or choosing transparency, does not remove a background already present inside a photograph.
Combine the images with Pixilo
- Open Combine Images and choose your JPG, PNG or WebP files.
- Choose the layout and use the arrows beneath the thumbnails to set the order.
- Set the width and height of the whole collage, including its gaps and outer margin.
- Keep each image fully visible or fill its frame. For a cropped layout, select each thumbnail and adjust its position. Sliders are available only in directions where the image is cropped.
- Set the gaps, outer margin and background colour or transparency.
- Download the PNG, check its quality and prepare the version you will publish.
You can add more pictures with Add images without losing the existing order, crops or settings. Replace images replaces the selection. The large-image layout needs exactly three pictures; adding a fourth switches it to a grid.
File and size limits
- Image count: 2–12 images.
- File size: up to 25 MB per image.
- Dimensions: each source image and the output must stay within 8,000 pixels per side and 32 million pixels.
- Total source pixels: all source images together must stay within 32 million pixels.
If the sources exceed the total pixel limit, resize copies before combining them. Reducing only the collage's output dimensions does not reduce the source pixel count.
Example: four photos of a finished kitchen
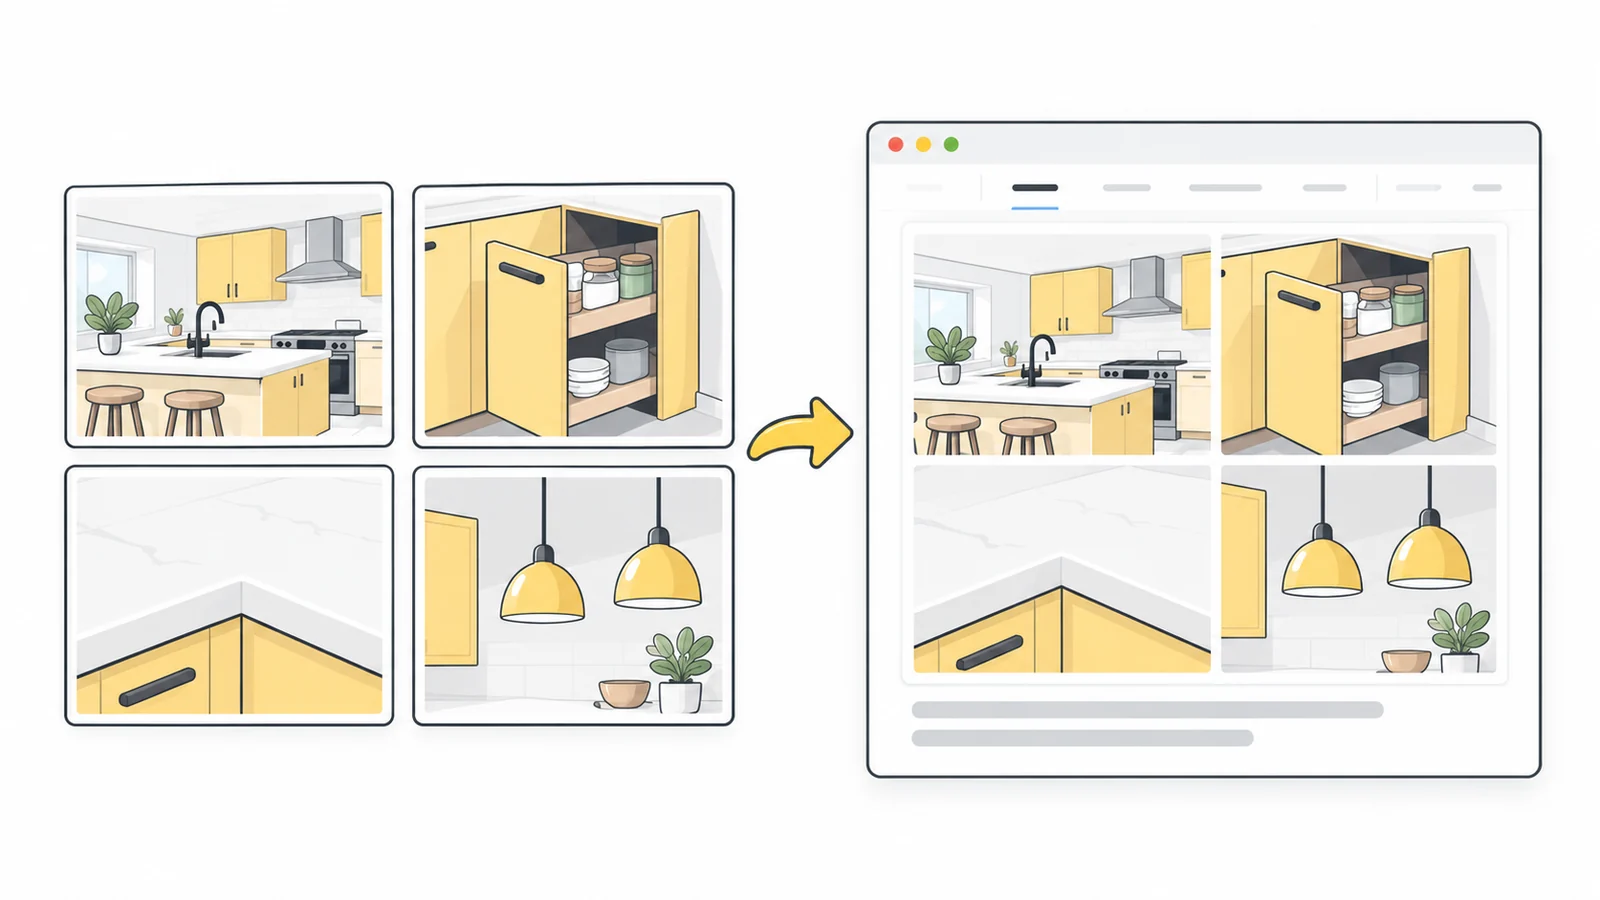
A renovation business wants a compact summary on a project page. It chooses a room overview, the inside of a storage cabinet, a worktop detail and the lighting above the counter. Each picture shows a different part of the same completed job.
The business starts with a 2 × 2 grid because it wants visitors to see all four aspects of the project. If the room overview were the main selling point, the three-image layout could give it more space, with two supporting details beside it and the fourth photo elsewhere on the page.
The page displays the collage at up to 600 pixels wide. For this example, export it at 1200 × 800 pixels, with 16-pixel gaps, a 24-pixel outer margin and a white background. The export is twice the displayed width to provide more detail for screens with a higher pixel density. These are example settings, not a required size for every website; our website image sizes guide explains how to choose dimensions for your page.
Fill the frames and put the overview first, followed by the cabinet, worktop and lighting. Adjust each crop to show the feature the photograph is meant to explain.
At a phone display width of 360 pixels, each photo in this arrangement is only about 170 pixels wide. The cabinet and lighting remain recognisable, but suppose the worktop joint becomes too small to judge. Move the worktop photo out of the collage and display it separately at a larger size, then arrange the remaining three photos around the room overview. Increasing the export dimensions alone would not give that joint more space on the page.
Check the collage in the actual mobile layout
Preview the page at desktop and phone widths without zooming. Check what visitors can actually understand: can they compare the two finishes, see the storage feature or follow the sequence? Recognising the general subject is not enough if the useful detail has disappeared.
Check the image inside the page, not only in the downloaded file. Your website theme may apply an additional crop to fit a fixed image area. Adjust that area or its display settings if it cuts off part of the collage.
If the arrangement becomes crowded, simplify it or keep the pictures separate. If your website builder supports a different mobile image, prepare a version with fewer photos or a vertical arrangement. Our responsive images guide explains that approach.
Keep headings and essential labels as page text. Text inside an image shrinks with it and is harder to update. Add explanatory captions in your website editor.
Add a caption and a useful text alternative
A caption can identify the project and explain the order of the pictures. For the four-photo kitchen grid, it could read: “Completed kitchen renovation. Clockwise from top left: room overview, pull-out storage, counter lighting and worktop detail.” Make sure the wording matches the final arrangement if you move or remove a photo.
An informative collage exported as one file needs a text alternative for the combined image. For the kitchen example, that might be “Renovated kitchen with pull-out cabinet storage, a flush worktop joint and lights above the counter.” Describe what matters, rather than just writing “Four-photo collage.”
If the pictures explain a more detailed comparison, provide the key differences in nearby page text instead of trying to fit the whole explanation into alt text. W3C's guidance on complex images explains how to provide both a short text alternative and a fuller description. Our alt text and filenames guide covers writing descriptions that fit the page.
Prepare the final file for your website
Pixilo saves the collage as a PNG, preserving transparency and avoiding further lossy compression during export. This does not restore detail missing from the source photos. A small image may look soft when enlarged to fill its frame, especially after a tight crop. Inspect each photo in the downloaded collage; use a larger original or give the photo a smaller frame if it looks noticeably softer than the others.
A collage made mostly of photographs can produce a large PNG. Use PNG to WebP or, if you do not need transparency, PNG to JPG to make a copy for your website. Compare its file size and visible quality with the PNG. Check fine details and edges as you adjust the quality setting; the smallest file is not useful if it obscures the feature you want to show.
If the page background needs to show through, keep a version that preserves transparency. JPG cannot do this. Our website image formats guide covers the format choices in more detail.
Upload your chosen version and confirm that the page uses the intended file and dimensions. Keep the original photos for future changes: you cannot rearrange the photos inside the downloaded PNG.
Build a collage that makes the page clearer
Start with an overview and the details that help visitors understand it. Try an arrangement that gives each picture the space it needs.
Combine your imagesPrepare a precise crop → ChatGPT
 Grok
 Google
 Perplexity
 Claude